It’s the six year anniversary of my cross country bike trip and I’m finally getting around to writing the post I’ve had on my mind since I finished: A Guide to Cross Country Bike Touring. While I won’t dwell too long on my personal journey (you can find those details here), I’m hoping for this to be a helpful how-to guide for people who are contemplating a biking adventure of their own.
The starting point for preparing for your bike tour is to have an idea of how far and where you’ll be going and to decide whether you’ll do a supported or non/self-supported ride. This blog post is specifically geared towards long (cross country) and self-supported trips since the planning and logistics there can feel overwhelming to first timers (I was there!). Maybe a more appropriate title would have been: A Guide to Self-Supported Long Term Bike Touring, but it didn’t feel as catchy 🤓.
Let’s start by saying that riding your bike across the country will be an unbelievable experience, providing you with a lifetime’s worth of memories and stories and a unmatchable sense of accomplishment. And you can do it. If you’re doubting that second point because you’ve never done it and you don’t know where to start with the planning process, my goal is to convince you otherwise with this post. Read on to learn more about planning your route, getting/packing the gear that you need to support yourself on the trip, and overcoming the daily challenges on the road.
Since I may have gotten a little carried away with the length and level of detail in this post 😅, I’ve included a table of contents to help you skip around:
Committing to the Trip
We’ll start with potentially the most important piece of advice: commit to the trip before you feel ready, because you will never feel ready. As far as I can remember – I read this advice here while I was researching bike touring, and it was exactly what I needed to hear when I was feeling totally overwhelmed as a bike touring noob planning a cross country trip.
It is impossible to work out every detail of the daily routes and accommodations of a multi week bike tour before you leave. And even if you could, it’s risky to set your daily accommodations in stone too far in advance when there is a good chance you’ll experience some delays due to weather, bike repairs, etc. at some point. I had the first three nights of lodging/camping arranged as the trip started, that’s it.
Aside from route details, it’s also easy to go down a never ending rabbit hole of research about the gear you’ll need to support yourself on your tour. Remind yourself that you’re not stuck with same gear you had to start your trip – you can easily pick up new items at local bike shops on your route (or have gear shipped to you), or ship any gear that you’re finding to be unnecessary back home to save on space/weight. It’s tough to know exactly what’s important until you’re out on the road.
All of this is not to say that you shouldn’t take your pre-trip research seriously, but a reminder that you’ll need to be comfortable embracing a healthy amount of uncertainty heading into your trip. And it’s totally normal to feel like you aren’t ready. For me, I had a ton of self doubt as the trip approached, sometimes waffling about backing out. As I boarded the plane to fly out West to begin my trip, I couldn’t help but think “what the f#&$ am I doing?”. But I’m sure that I would still have had that same feeling with an infinite amount of planning. I ultimately made it and I’m so thankful to this day to my 2017-self for committing before he felt ready.
Route Planning
Let’s talk about planning the route you’ll take on your tour, both the big picture choices you’ll make before you set out on your journey as well as the finer details of each day’s ride.
Following a well established bike route versus charting your own path
The first decision to make is whether or not you will follow a well-established bike route. For a cross country tour, the TransAmerica Trail is arguably the most popular (see Adventure Cycling Association for other routes around the U.S.).
There are a ton of benefits to sticking with an established route. First and foremost, it’s much safer. These routes are thoroughly researched by cartographers to contain more bike-only trails and bike-friendly roads. Plus, since they are well traveled by other cyclists, motorists along the route are more accustomed to respecting bike lanes. The routes will also contain bike-friendly inns, campgrounds, and shops, and you’ll be likely to cross paths with many other cyclists on the same (or similar) journeys.
On the other hand, the primary benefit of blazing your own trail is the added freedom and flexibility to customize your trip. Always wanted to sightsee in St. Louis? Have some friends you want to visit in Chicago? You can make a list of cities that you want to visit and then see how many of them you can hit on a reasonable route. The downside is that the added freedom requires significantly more time/effort to plan a safe and bikeable route.
I opted to follow my own route so I could have the extra flexibility. While I’m still happy with the choice to this day, I totally underestimated how much planning and logistics would be involved. See the following sections for some advice on the planning process.
Choosing your start and end points
If you’re biking one big loop (or an out and back) that starts and ends at home, then you already have this figured out. But if you’re doing a one way trip like a cross country tour, then you’ll need to choose end points of your route and decide which direction you’ll go.
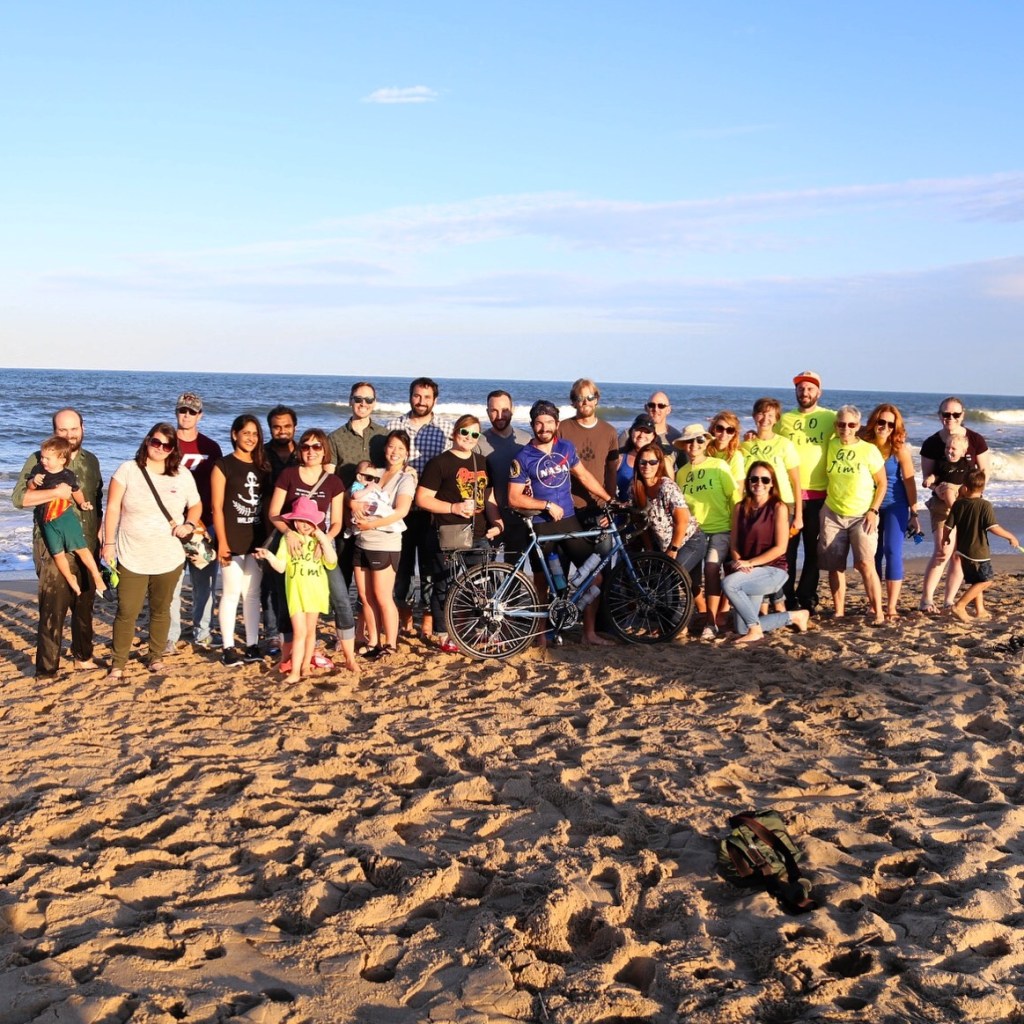
The main consideration here is the logistics required to travel from home to your starting point or from your end point back home with your bike and all of your gear. If you don’t live close to either end of the route, you’ll have to figure out these logistics twice for the start and finish. Otherwise, it is definitely easier and more convenient to get the traveling done upfront to your start point and then end your tour at home (or nearby). Plus you have the added bonus of being able to celebrate with friends and family when you finish your trip 😎.
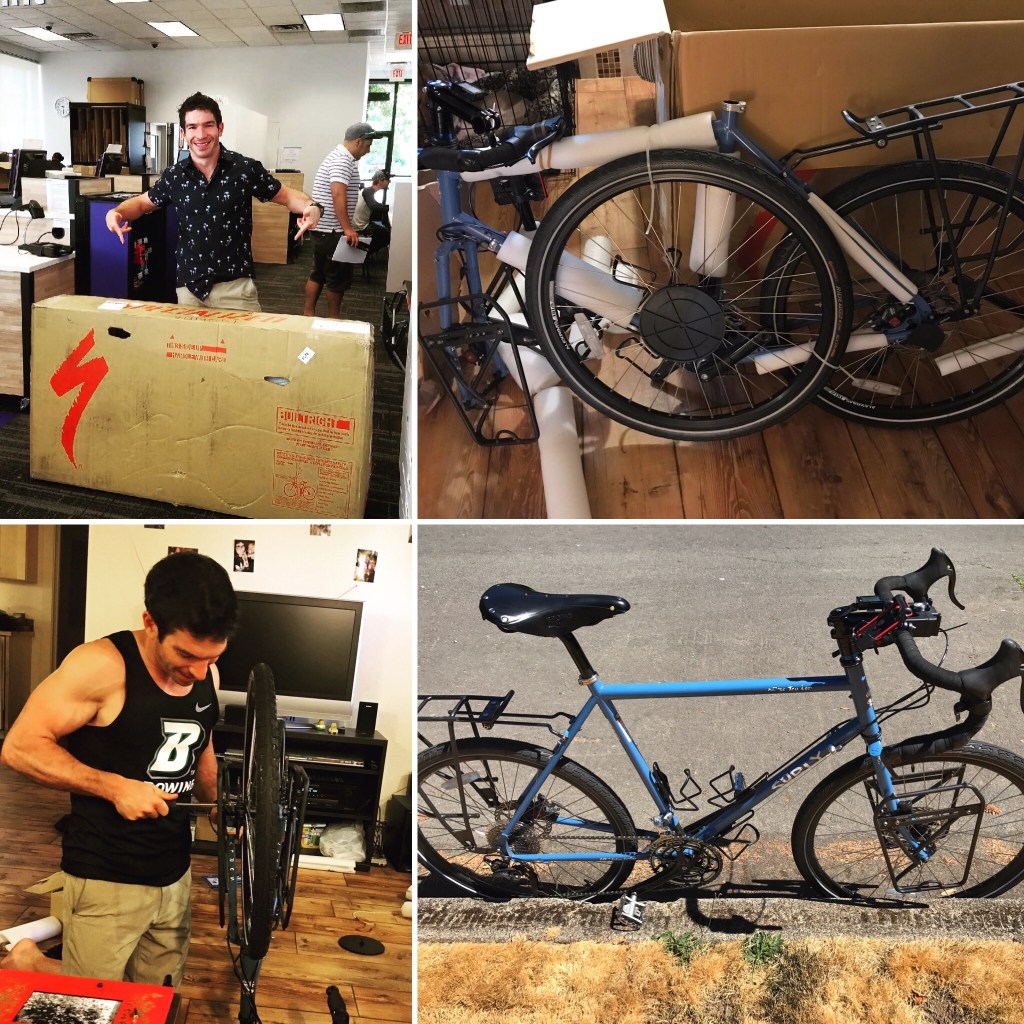
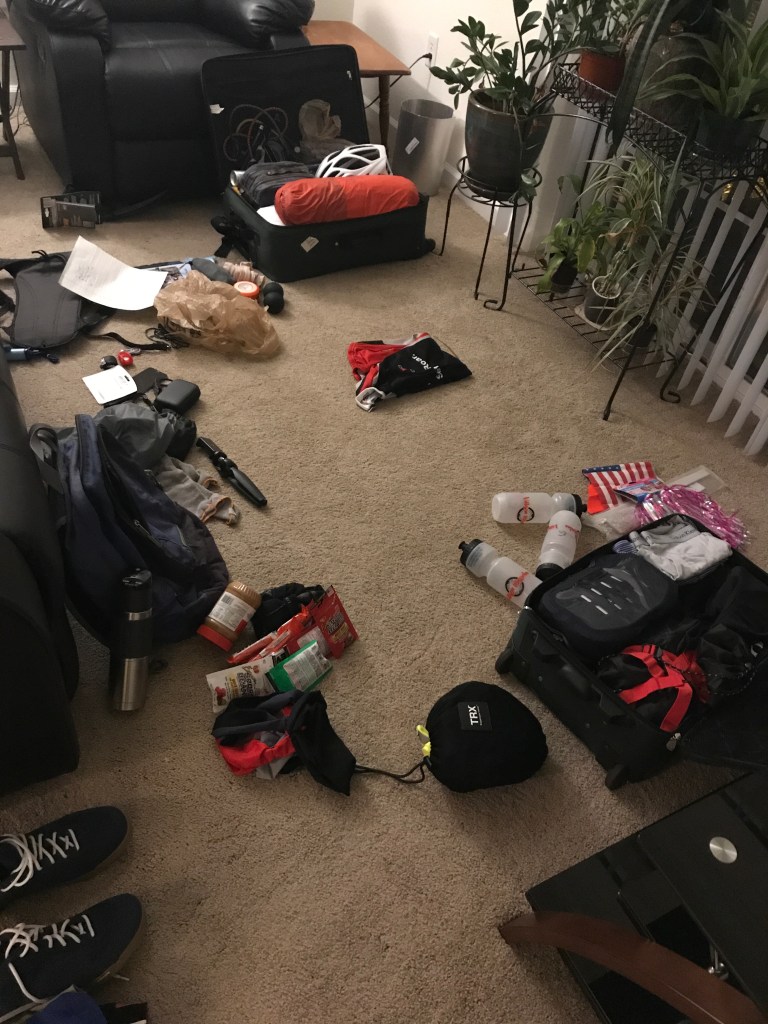
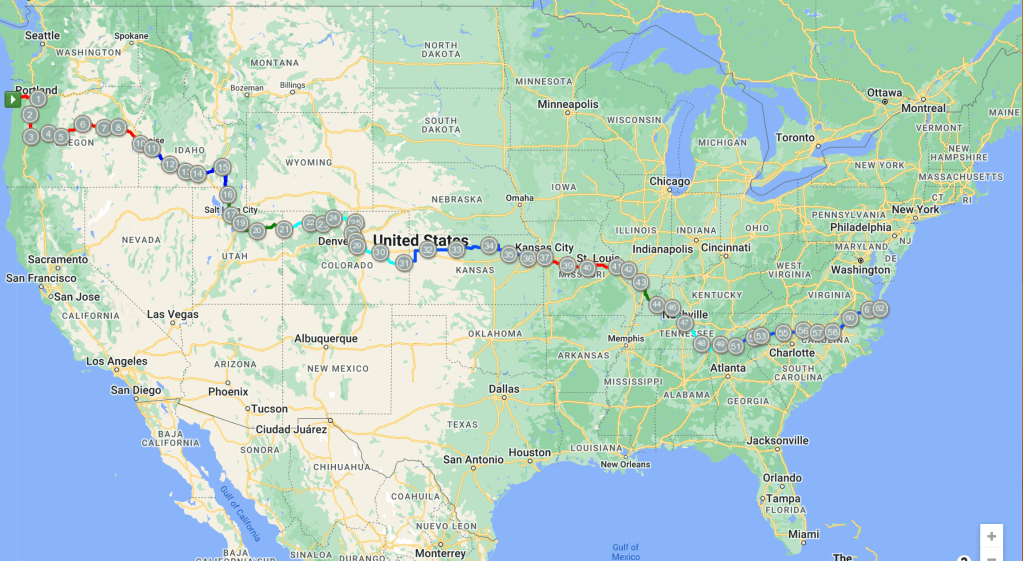
Since I live on the East Coast in Virginia, I opted to finish my ride there and travel to Oregon to start the trip. I bought a one way plane ticket out West and shipped my bike a few days ahead of time (a local bike shop helped with the disassembly/packing/shipping for around $100 total) and picked it up at the UPS store in Oregon. I packed all of my gear in an old suitcase I was okay with donating once I got there.
Choosing the time of year
With your route sketched out, you now need to decide what time of year you’ll embark on the journey. This of course first depends on your work flexibility, family obligations, and other life commitments.
The next important consideration is what the weather will be like along your route at different times of year. You’ll want to minimize the likelihood of riding through extreme heat or cold, or excessively rainy weather, if possible. For example, if you’re taking a northern route across the country (like the TransAmerican Trail), you’ll likely want to do so during the summer.
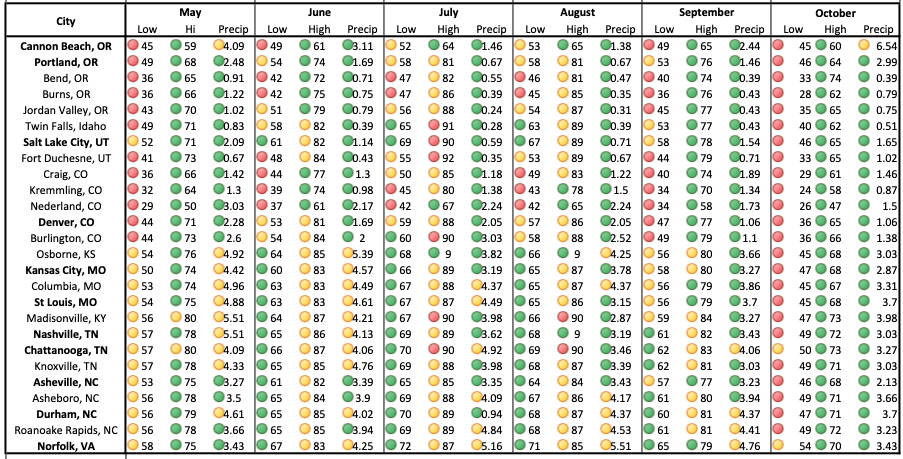
To better time your trip, you can jot down the historical weather in a handful of cities along your route for the months you’re considering. From there, you can see if you can adjust your start date to decrease your chances of biking through bad weather. Look in particular at places known for more extreme weather, like the Rocky Mountains.
See below for a screenshot of the spreadsheet I created to do this for my trip, color coded for good (green), decent (yellow), and bad (red) conditions (Note: nerding out on this process like I did is definitely not required 🤓). I left for my trip at the end of July and finished at the end of September, wanting to avoid colder weather in the months of May and October along my route.
Planning your daily rides
Now that we’ve covered the “big picture” route planning for your bike tour, we need to talk about planning the details of your daily rides. As I alluded to earlier, one of the biggest surprises for me was how much time and effort this would take, in large part because I wasn’t following an established bike route.
When I pictured my daily rides before I embarked on my journey, I imagined simply biking all day until I was tired and then stopping at the next town to find accommodations for that night on the fly. Turns out that’s not very practical for much of the country where you can bike 50-100 miles sometimes without seeing any civilization – you’d easily find yourself stranded or sleeping on the side of the road without planning ahead.
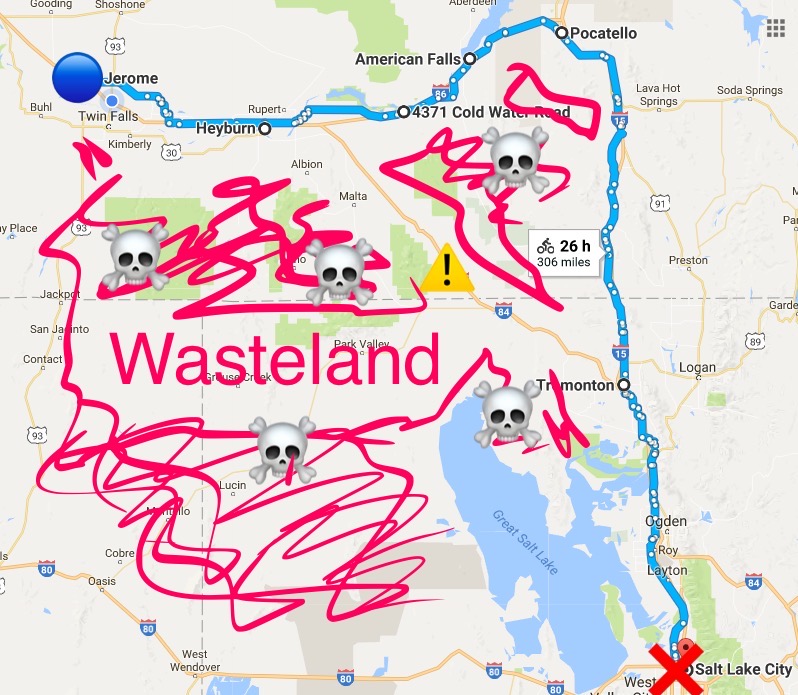
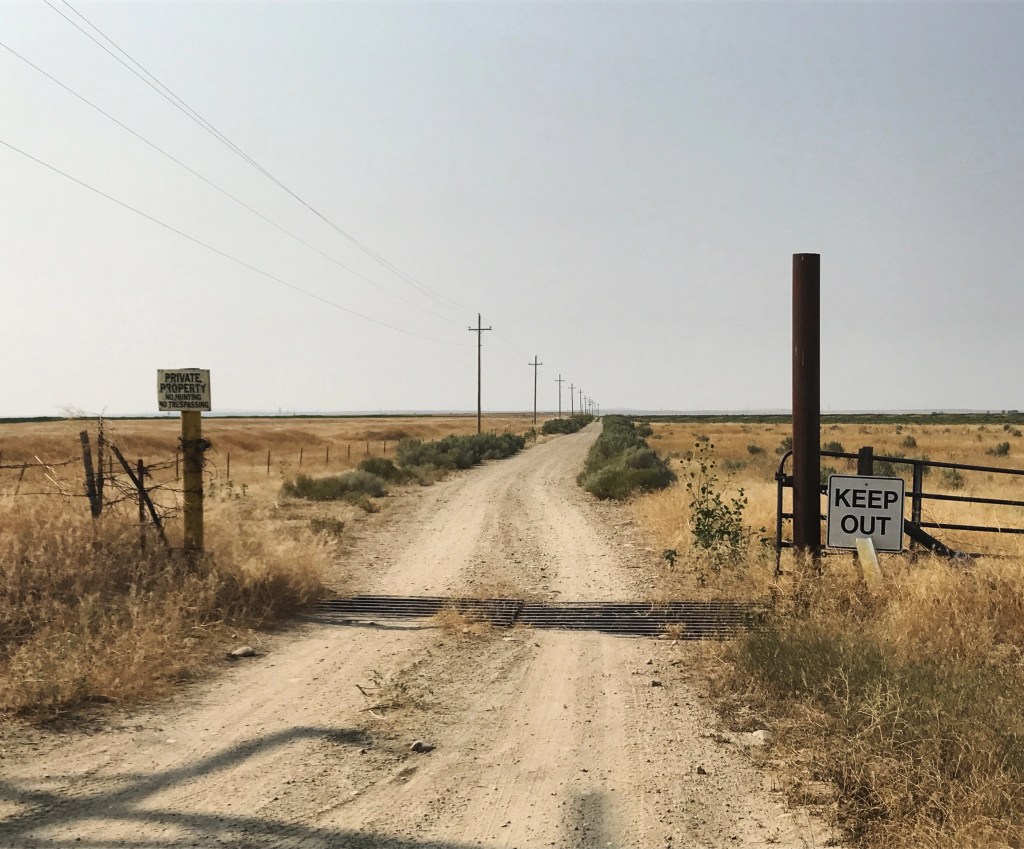
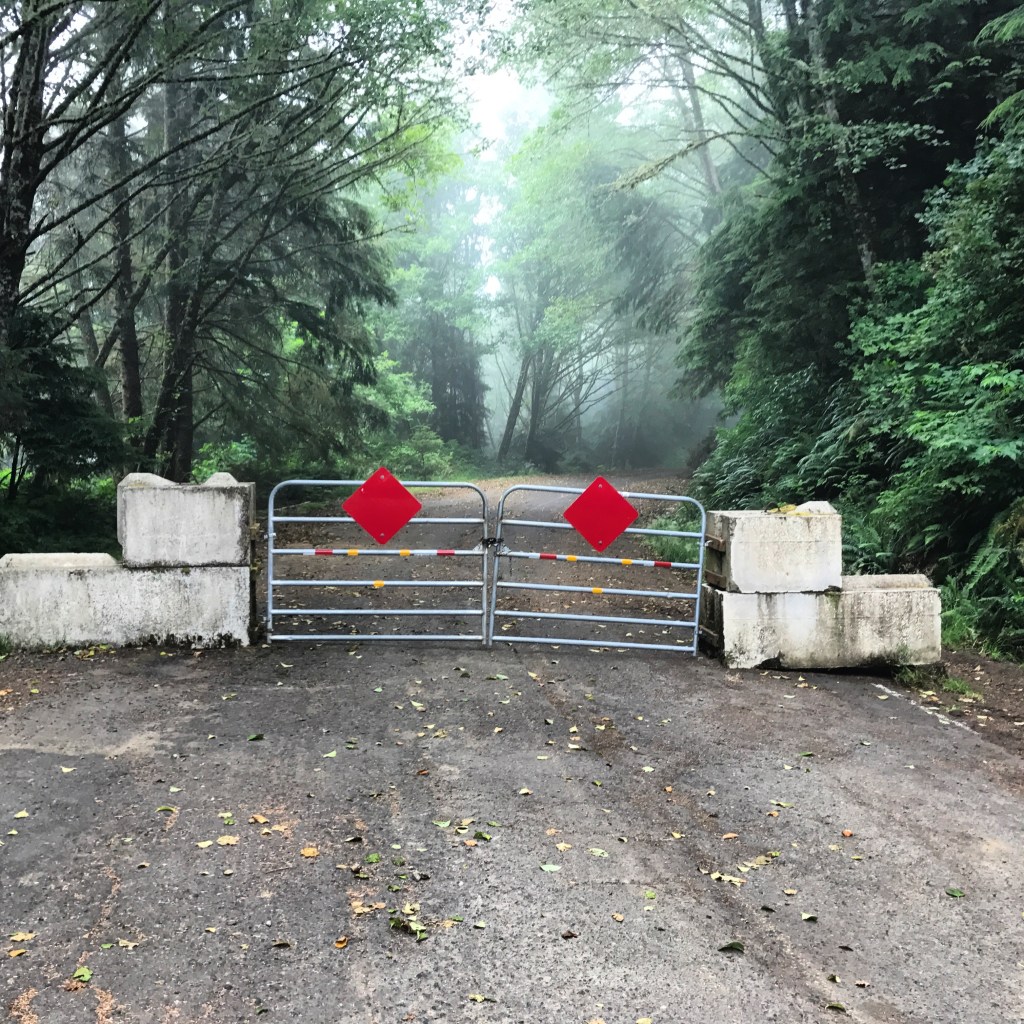
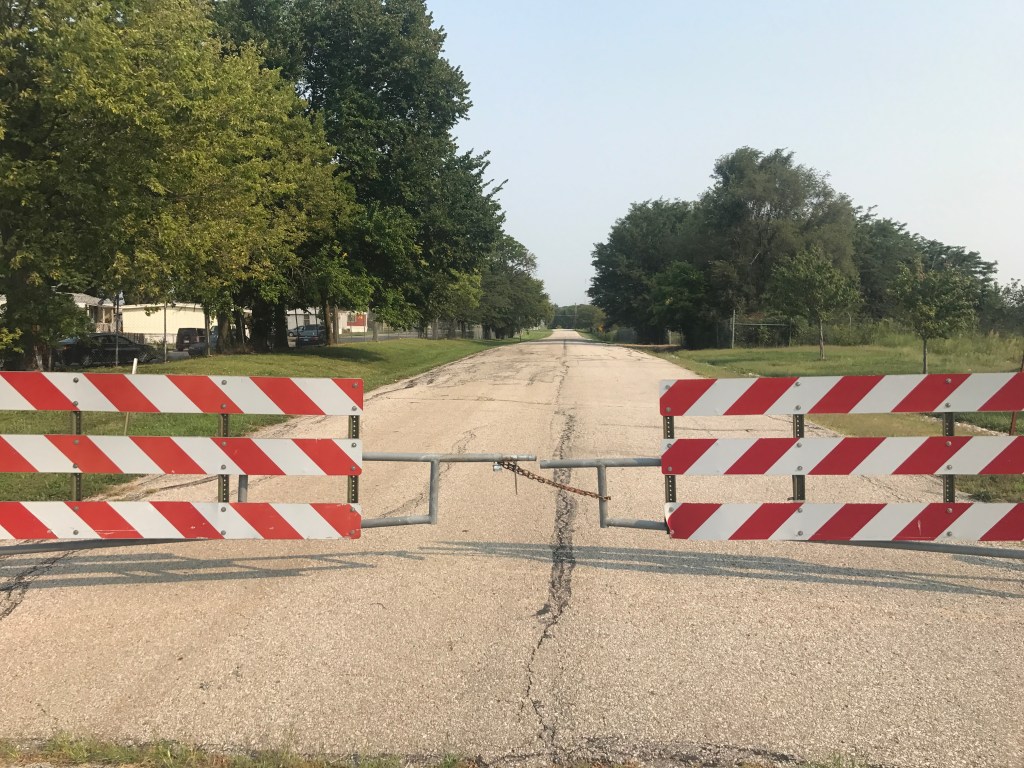
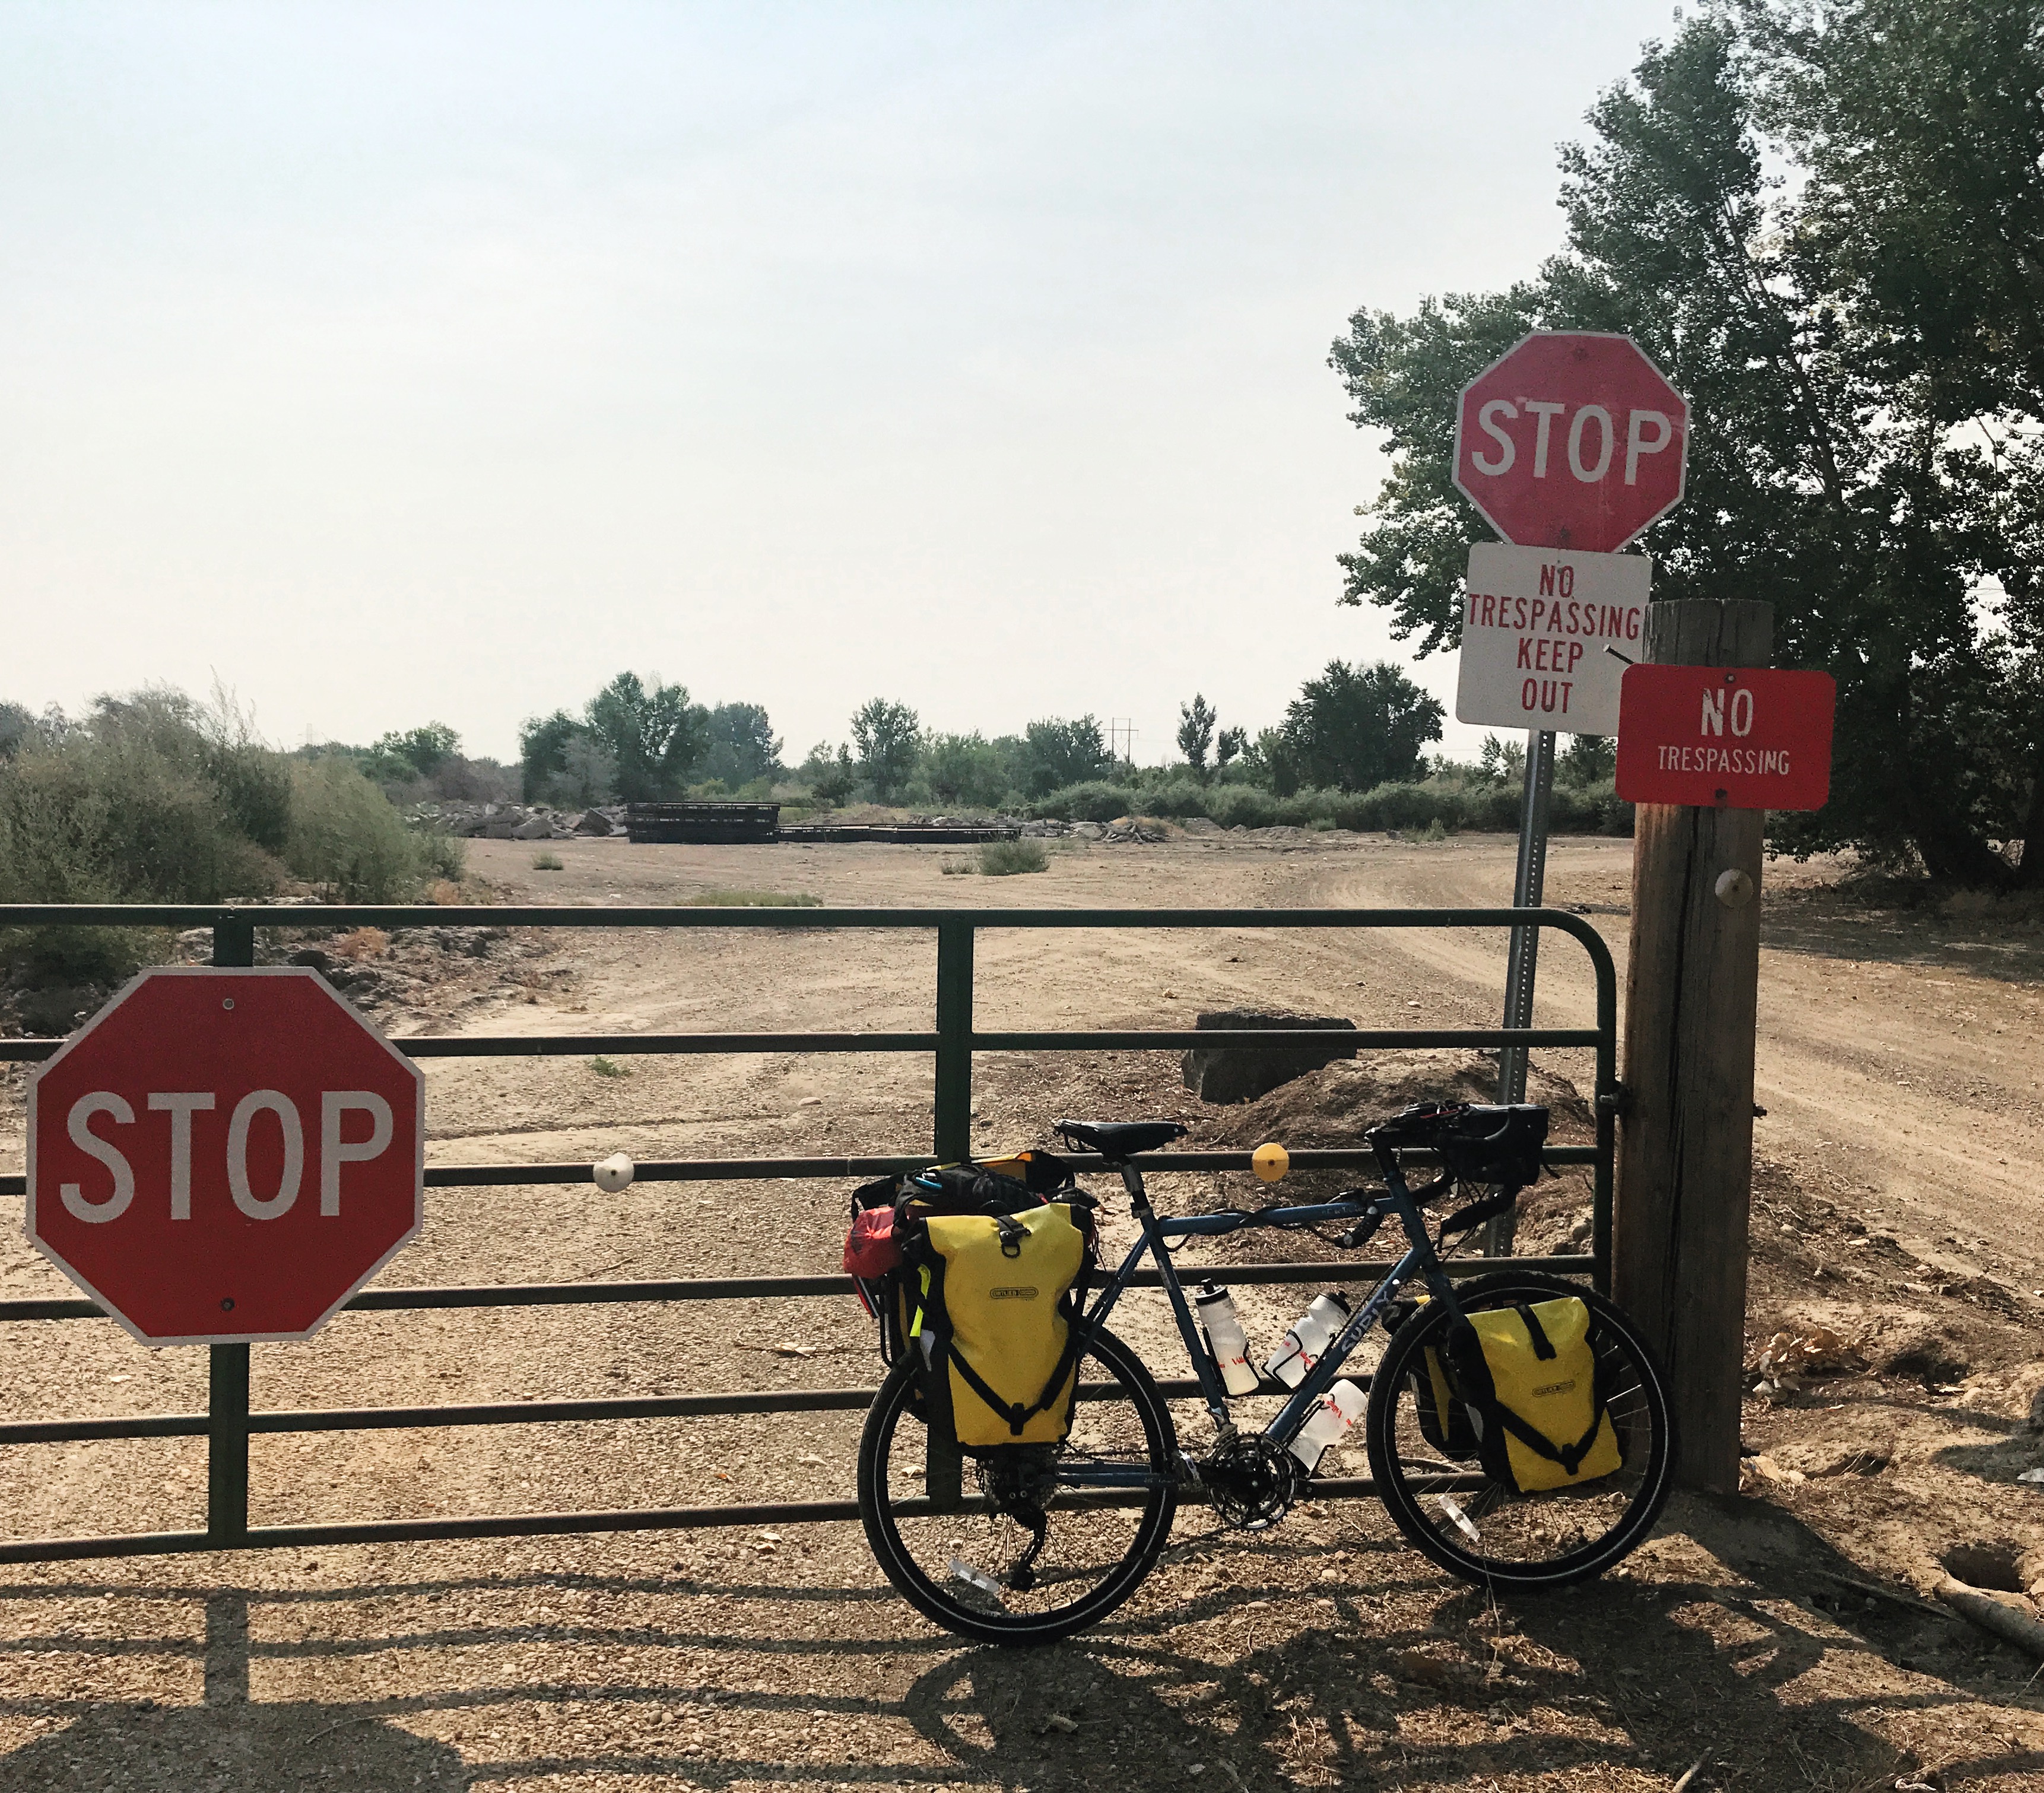
I also expected to rely on Google Maps bike directions for most/all of my navigation, not knowing it would lead me into many dead ends and even on to a live firing range in a desert one day 🤠. It’s worth pointing out that I took my trip in 2017 so it’s possible they are more reliable these days. See below for some examples of Google Maps bike direction fails from my trip:

All of this is to say, you need to take daily ride planning seriously on your bike tour, especially if you’re not following a popular bike trail. Here are some tips for doing so:
- Plan your upcoming accommodations in short, manageable segments. The sweet spot for me was planning 3-5 days/nights at a time. Use rest days or days with shorter rides and more free time to work on these logistics.
- Go beyond simply following Google maps. Use Google maps bike directions as the starting point. It will avoid obvious hazards like interstates. But as I mentioned above, you don’t want to rely solely on these directions. Go to satellite view in Google Maps and give your route a thorough scan, looking for any dangerous/impassable sections. Make any manual adjustments to the route as necessary. You can then save the directions that contain any modifications you’ve made so that you can follow them specifically when riding – see here for instructions on that.
- Strategize nutrition/hydration pit stops for longer rides. Make sure you’ll pass through enough civilization to restock on water/food, and if not, make sure you pack extra of each with you for long trips. When you’re out West especially, you may need to do some zig-zagging and extra mileage to make sure you pass by gas stations or stores to re-up your supplies.
- Ask a friend/family member to help you do route recon. I had a good friend that was invaluable for helping with the logistics/planning on my trip (nicknamed “Mission Control”). This not only gave me peace of mind on the route I was following, but freed up more time to just enjoy my journey.
Gear
You could write an entire E-Book on bike touring gear! So I’m doing my best to not get too carried away in this section….
The Essentials
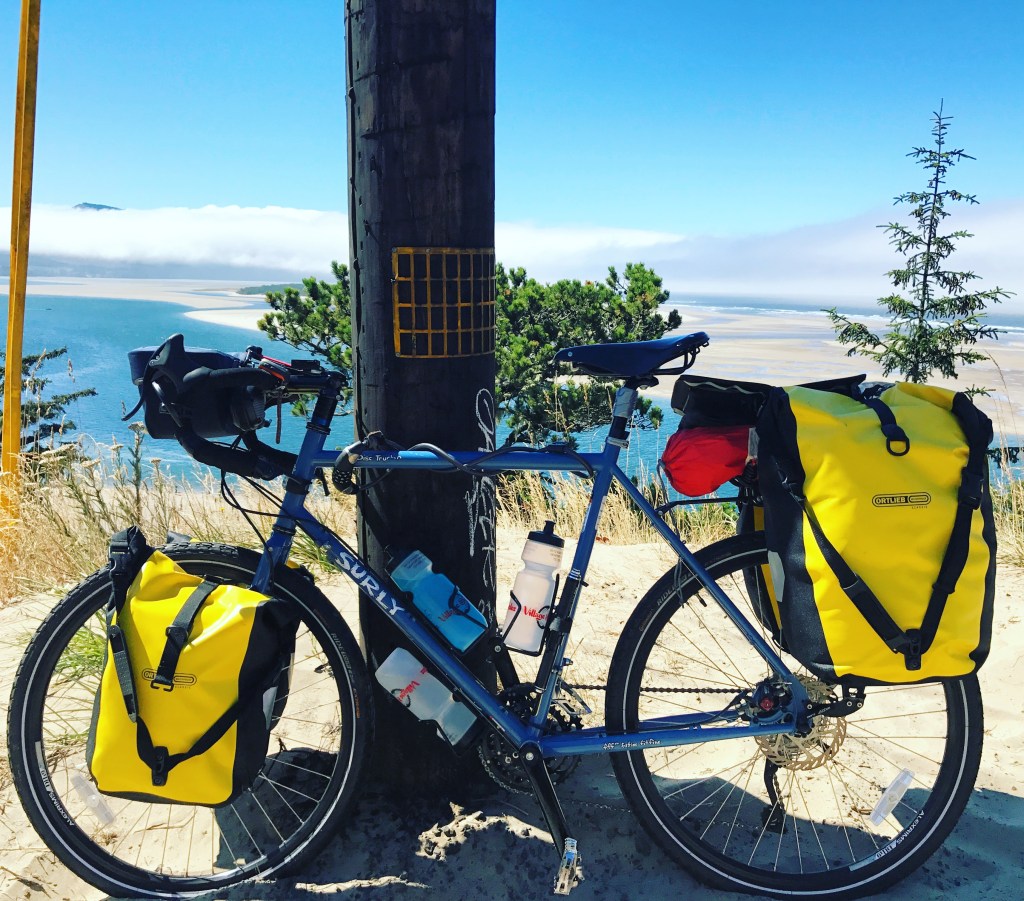
First thing’s first: you need a durable, dependable bike to take you the distance and large enough panniers (bike bags) to carry all the gear you need to support yourself on the tour.
Get yourself a touring bike if you don’t have one already. Touring bikes typically have steel frames so they’re sturdier and can carry heavy loads (your gear), have fatter tires to handle dirt/gravel roads that you’ll likely come across, and are built for weather-proof riding (disc vs. rim brakes, for example). In addition to choosing the right bike for you, make sure to get the right fit to the bike with a professional adjustment prior to your trip.
While touring bikes are shaped to provide more comfort for long rides, you may want to also test out a few upgraded bike seats before your trip… your butt will thank you a few hundred miles into your trip 😜.
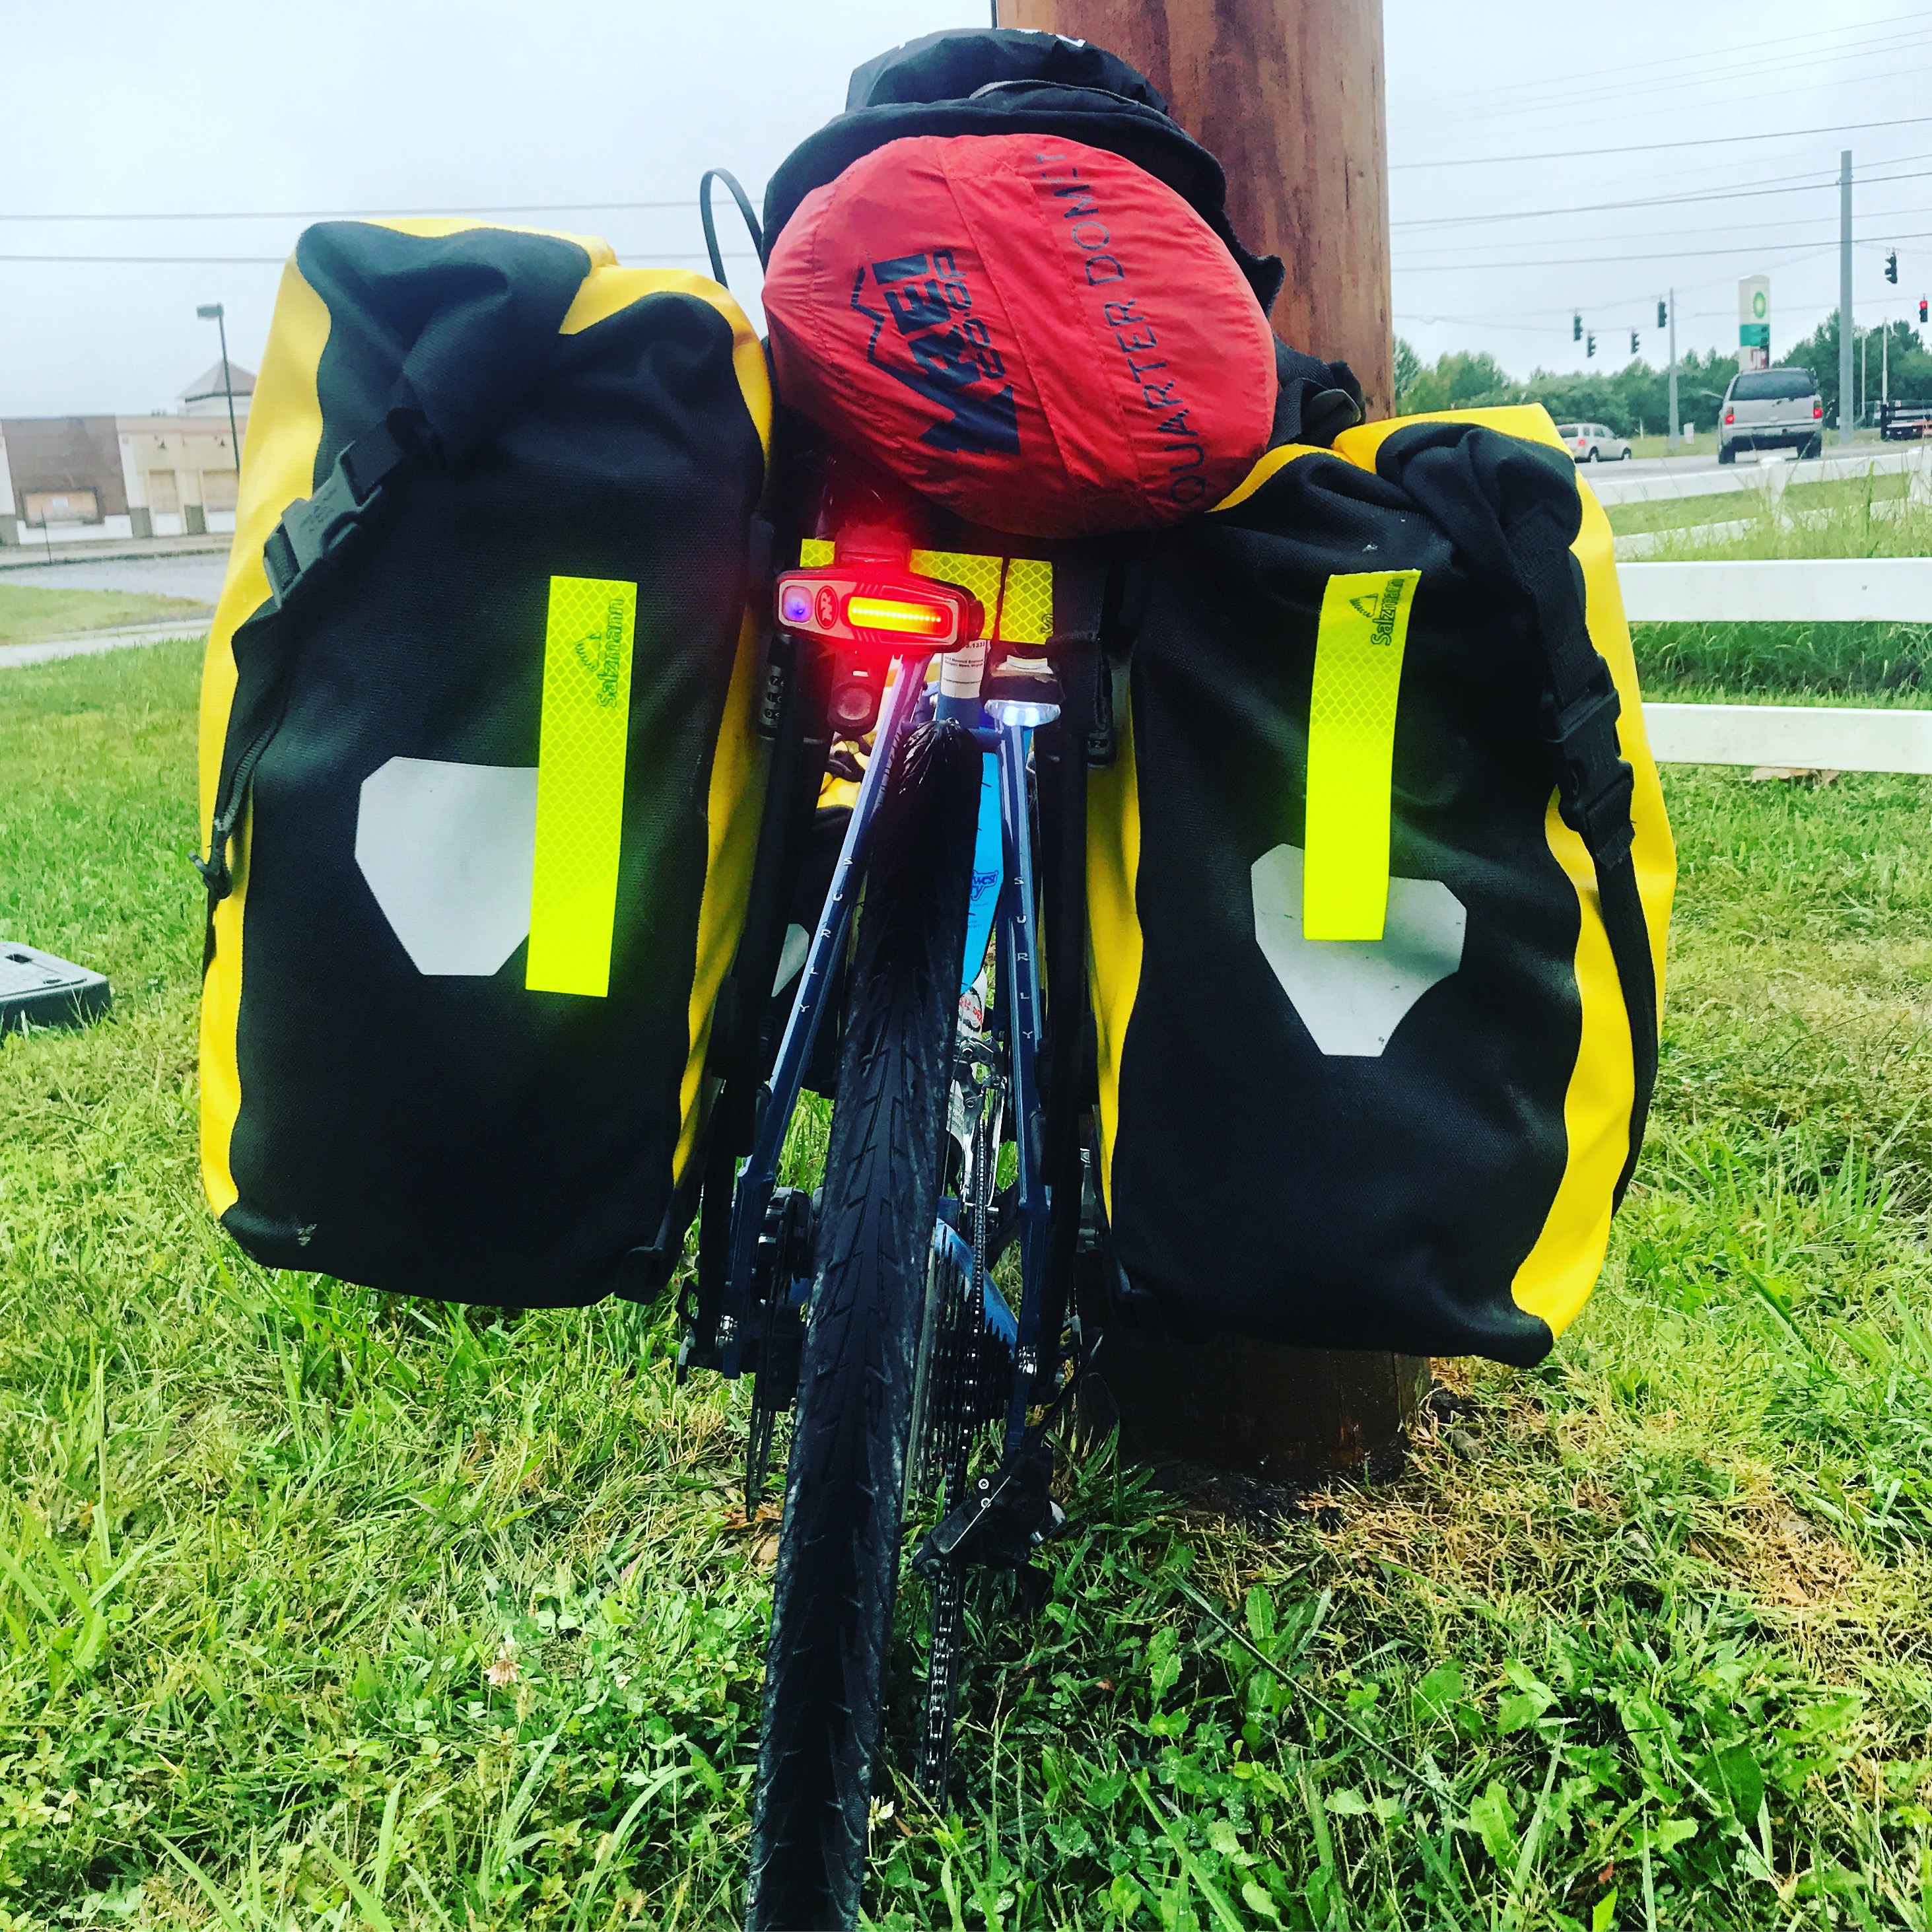
To carry all of your gear, you’ll need to get yourself a set of front and rear panniers, along with the racks for mounting them to the bike. I suggest splurging a bit here for waterproof bags to keep your gear dry on rainy rides. I also recommend adding a handlebar bag to carry smaller items that you use more frequently on your rides (phone, wallet, snacks, etc.).
Last but not least – you’ll need a quality bike lock to protect your ride!
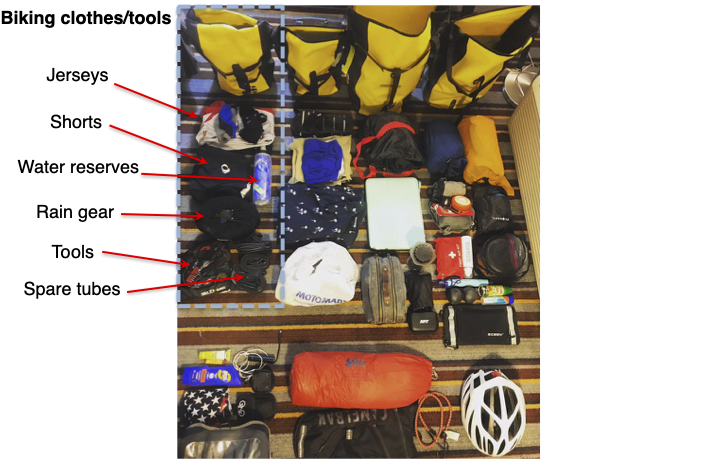
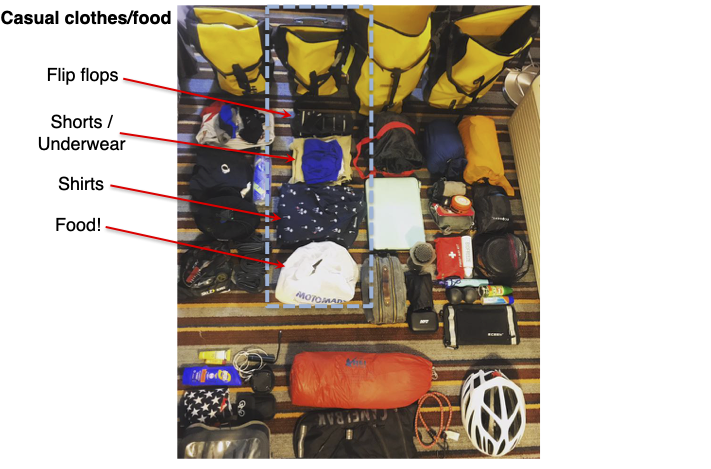
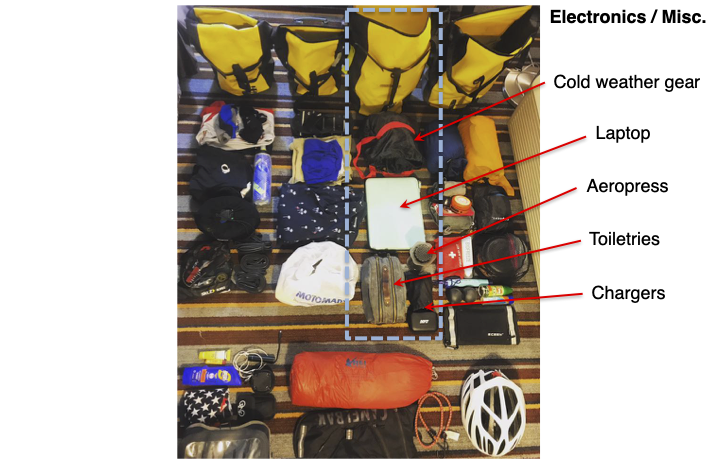
Bike Tour Gear Inventory
Rather than list out and talk about alllllll suggested gear for a bike tour in gory detail, I’m opting instead to provide a gallery of my cross country gear in it’s entirety below. I’ve highlighted the different groups of gear (biking clothes/tools, casual clothes, camping gear, etc.) in each bike bag along with labels for most of the items. Click a picture to view the gallery for details!:
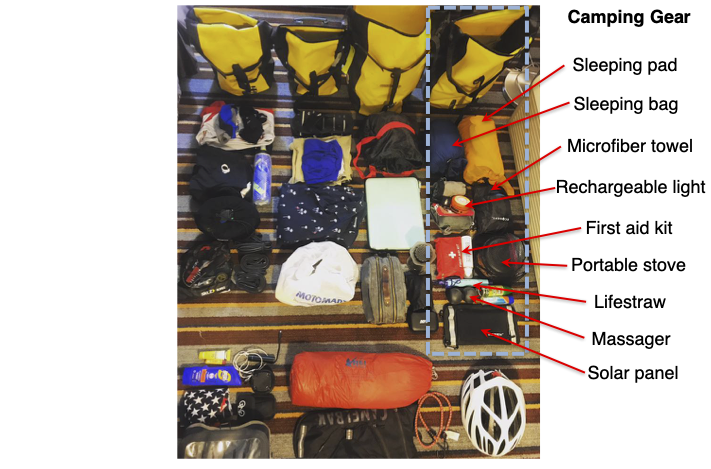
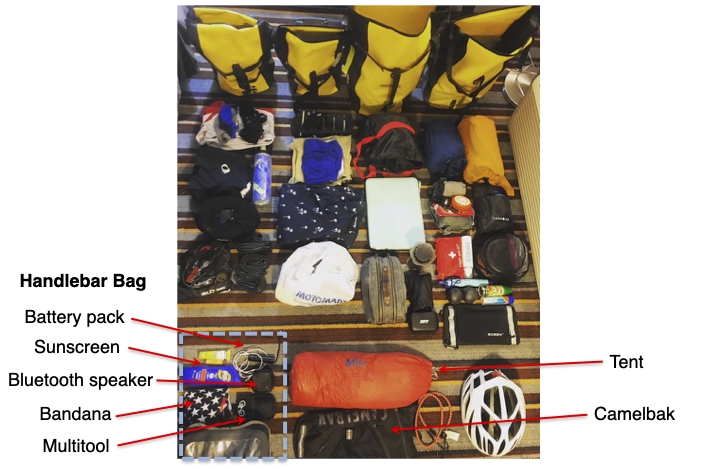
A couple items not pictured above:
- Bear spray: I had this for the first few weeks of my trip before I had an accidental discharge in my bike bag and had to throw it away 🙈. Thankfully I never needed it prior, but it was comforting to have it when camping in relatively desolate areas out West.
- Duct tape: I’ll pass on a pro tip that I read a couple weeks before I started my trip: wrap a healthy sized chunk of duct tape around your seat post so you have it around just in case without taking up extra space in your bike bags👌.
Packing the Gear
Once you’ve got a handle on the gear you need for the tour, packing it is a whole nother can of worms! Here’s a few general goals/pointers to keep in mind for packing:
- Make frequently used items more accessible. Put your phone, sun screen, portable charger, etc. in the handlebar bag. Pack higher priority items (food) towards the top of your panniers with less frequently used items (extra bike clothes) at the bottom. You’ll also may want to put more frequently used items in the front panniers vs. the back since they are typically easier to access.
- Group your gear strategically. Beyond just grouping similar items (all of your camping gear) to be more organized, consider having your bags designated as clean & dry or dirty & wet. For example, I kept my clean casual clothes in the same (clean stuff) bag as my food while combining bike tools, rain gear, and bike clothes in the same (dirty stuff) bag.
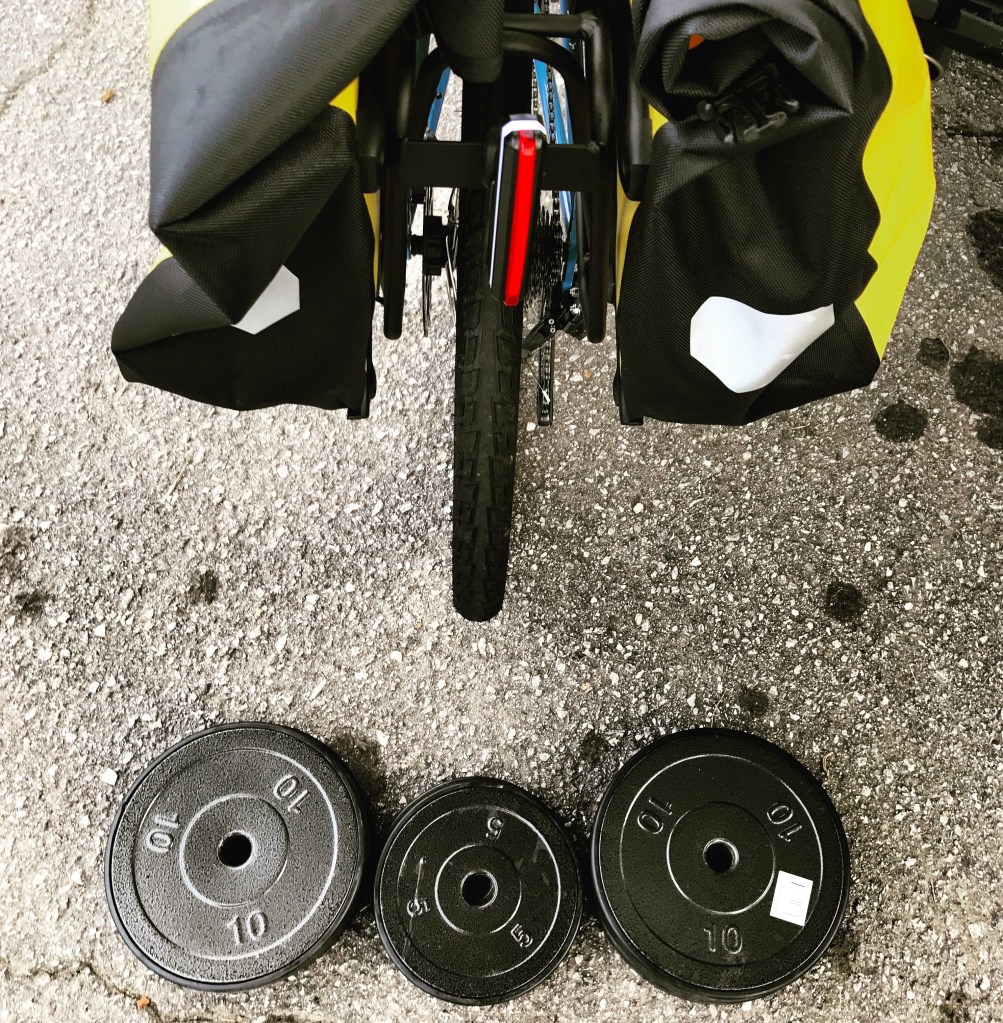
- Keep your weight balanced. Your weight should ideally be equally distributed from left to right and from front to rear bags (or slightly more weight in the rear). Also aim to place heavier items towards the bottoms of your bags to keep your center of gravity low. Weighing and shuffling gear around to get this (close to) right is a fun pre-trip activity 🤓.
- Protect fragile items. If you’re traveling with any electronics or other fragile/valuable items, it’s a good idea to pack those on the side of your bike that you lean towards to park it. This reduces the chances of breaking any gear if your bike falls.
- Minimize weight. This is obvious but worth the reminder – you’re going to feel every pound of your rig when you’re powering it up long/steep climbs. I had 40-45 pounds of gear and there were some days I wanted to abandon some on it on the side of the road 😅. Aim to have no more than 50 pounds, but again, the lighter the better. Keep in mind you can ship gear home if you find that it’s not needed.
For more tips on the process, here’s a solid article dedicated specifically to packing for a bike tour from REI.
My Top Five Favorite Gear
I’m finishing off the section with a list of gear that I used and/or appreciated the most throughout the trip. Here’s my top five items roughly in order of awesomeness:
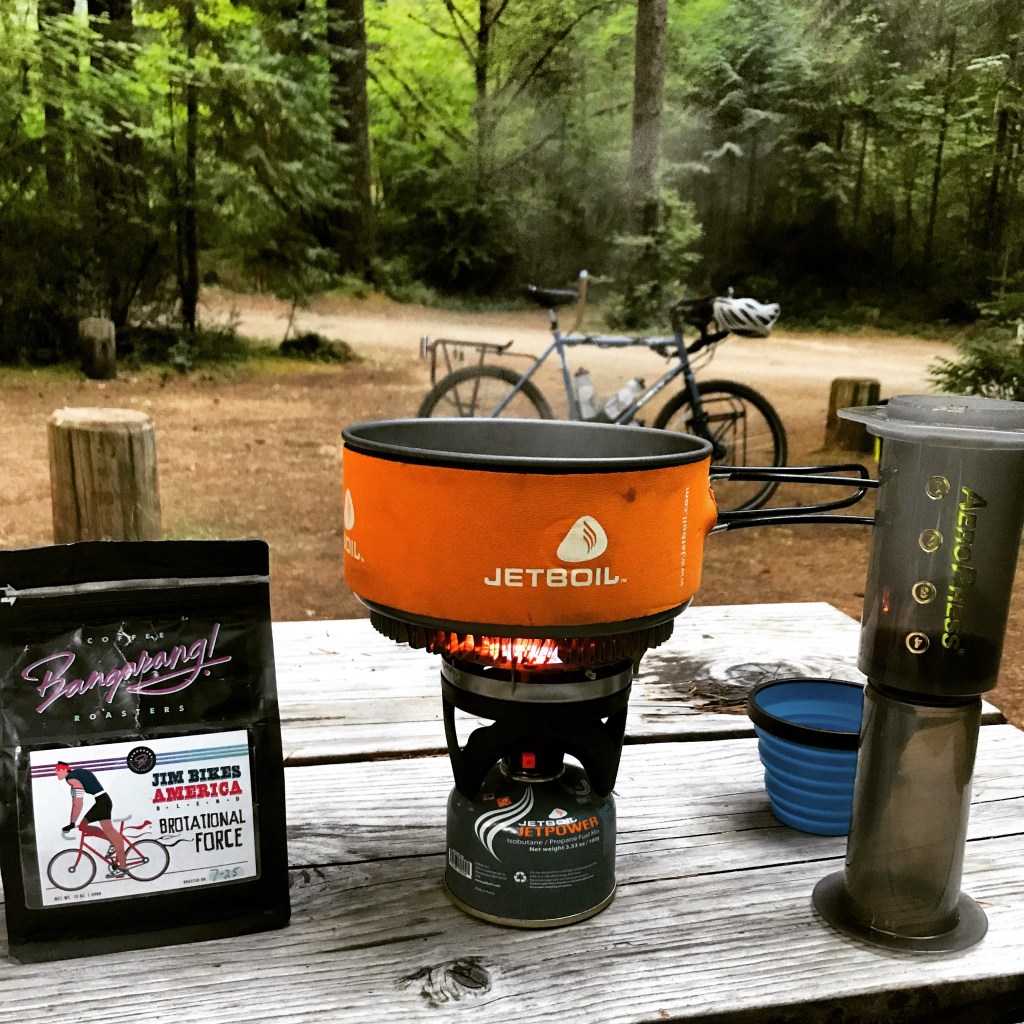
1. Aeropress Coffee Maker

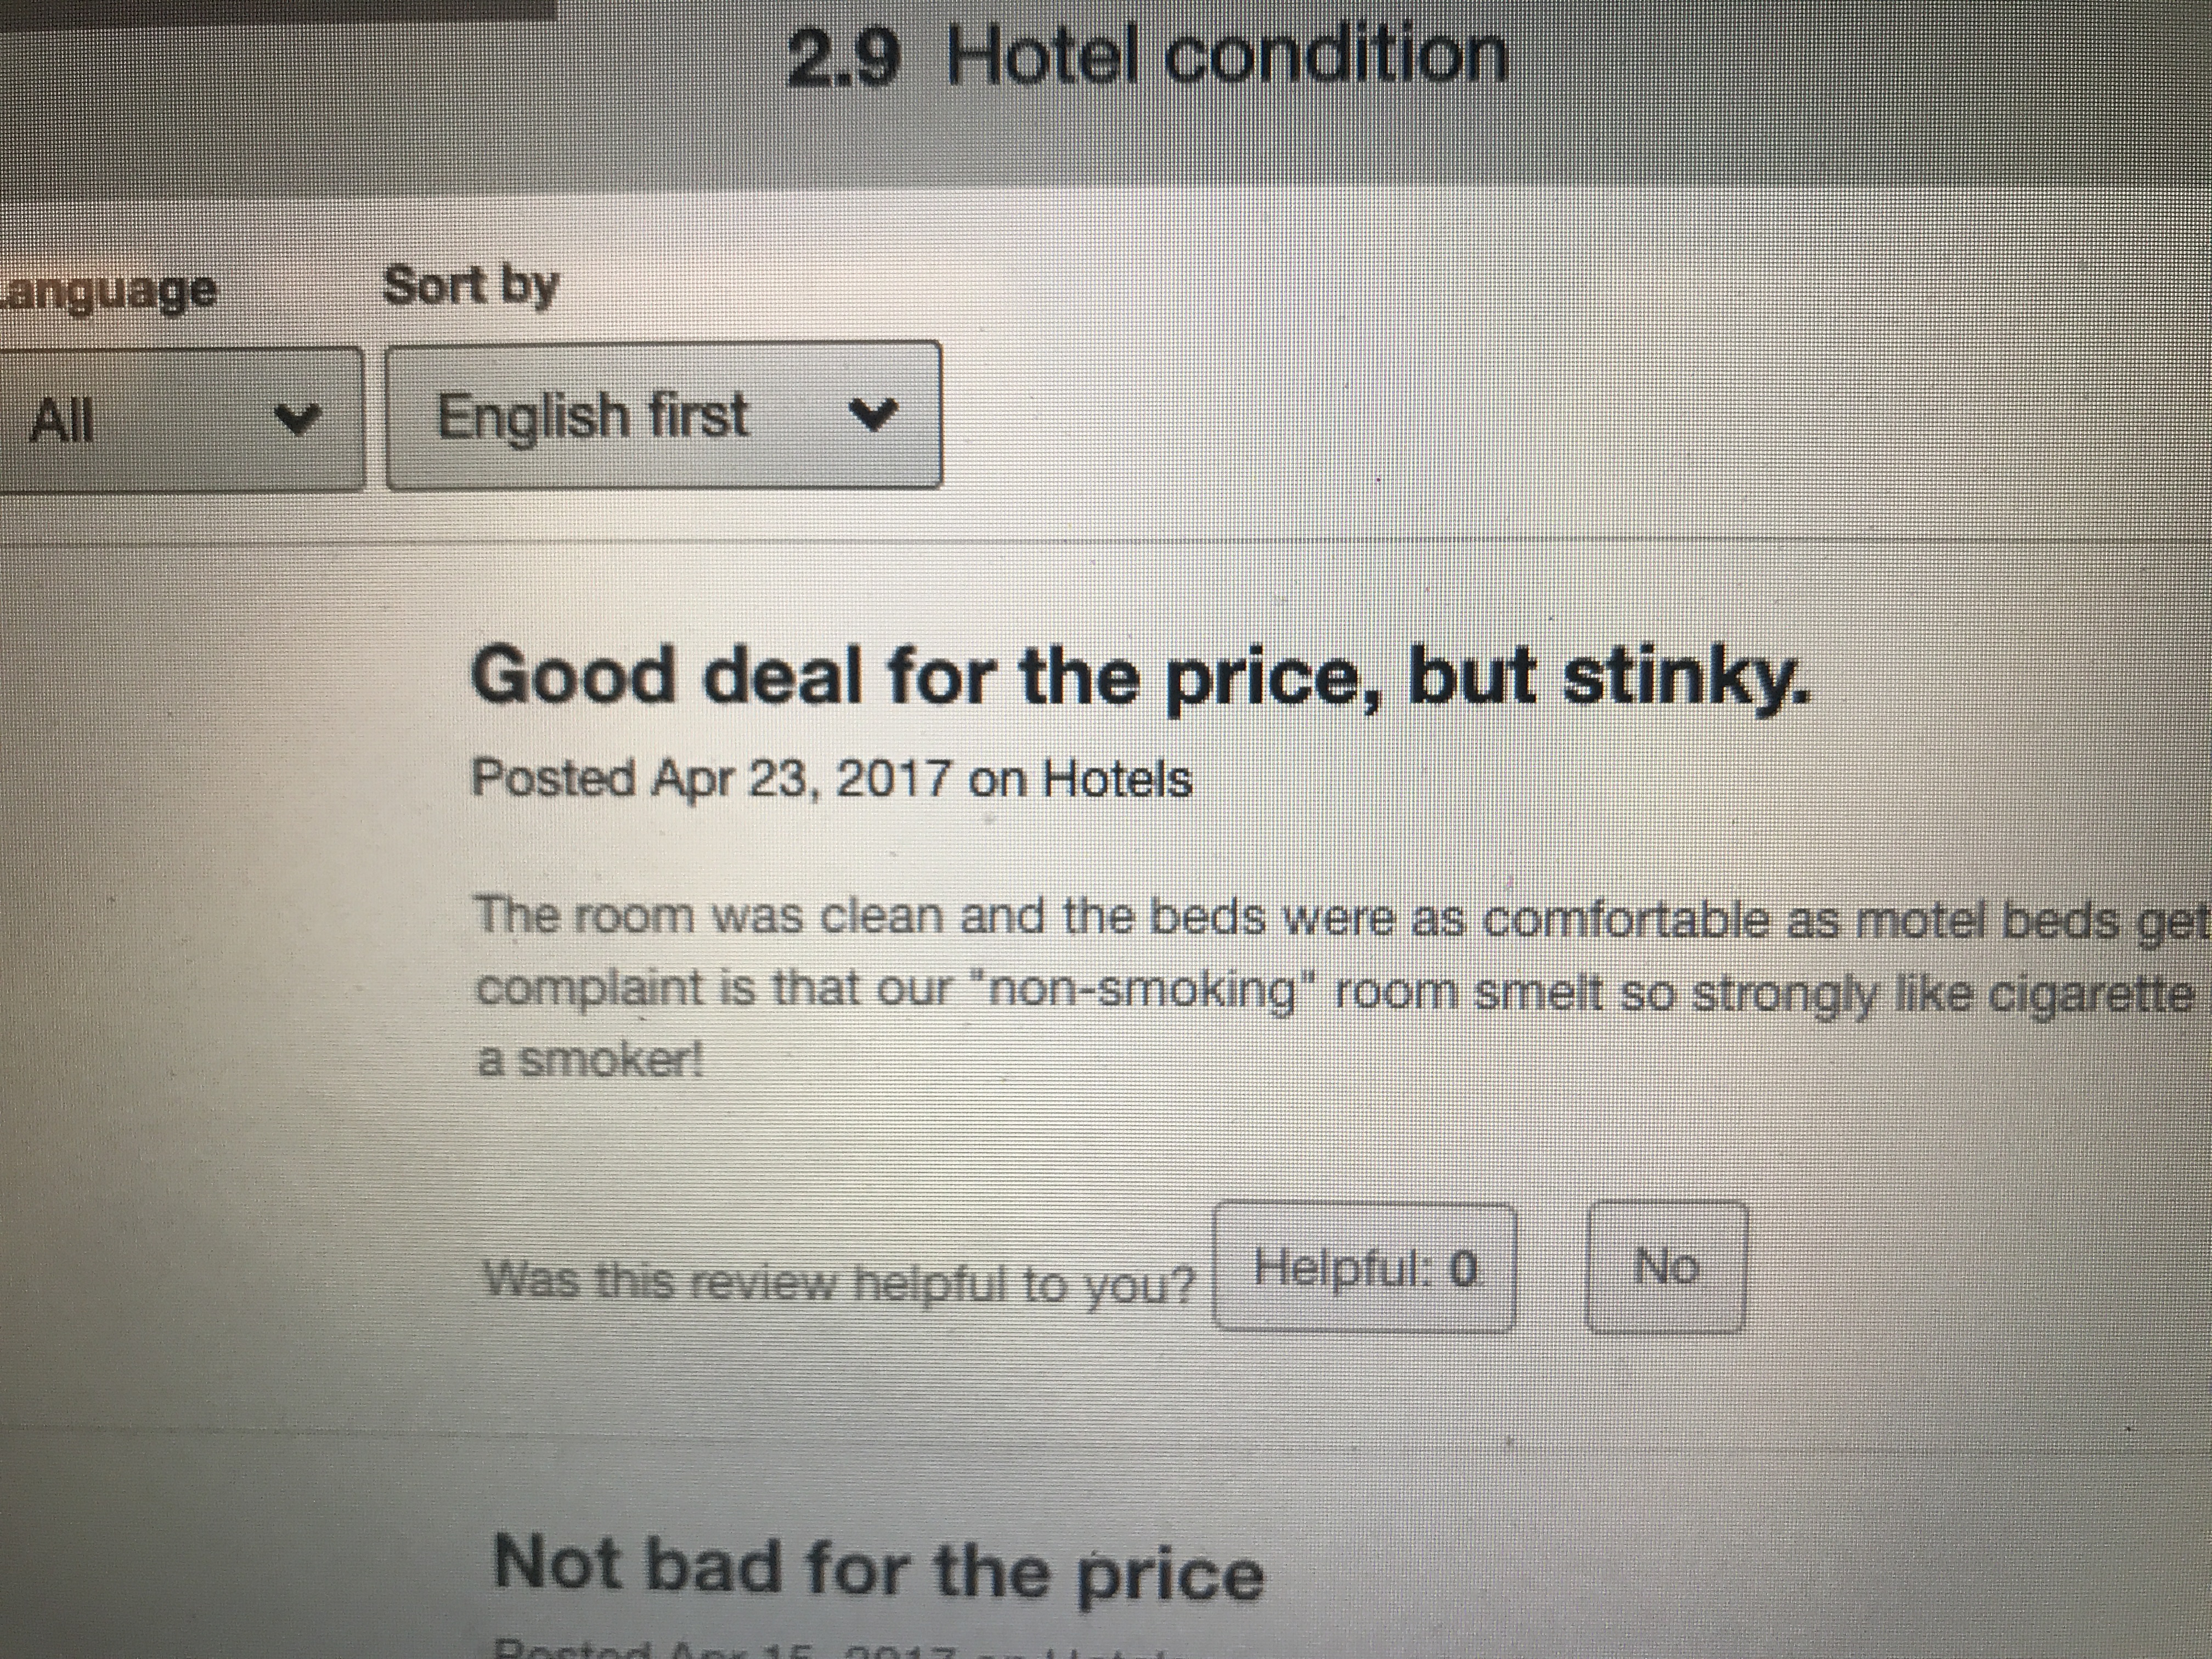
As a coffee lover, there was nothing like having a freshly brewed cup of coffee each and every morning of the trip as a comfort from home. The Aeropress is the perfect bike tour solution for this: it’s portable, unbreakable, easy to clean/use, and makes a great cup of coffee. I used a portable stove to make coffee with it while camping and even used it in the cheap motels I stayed in to avoid the old/musty coffee makers there 😅.
2. Commuter Bike Shoes
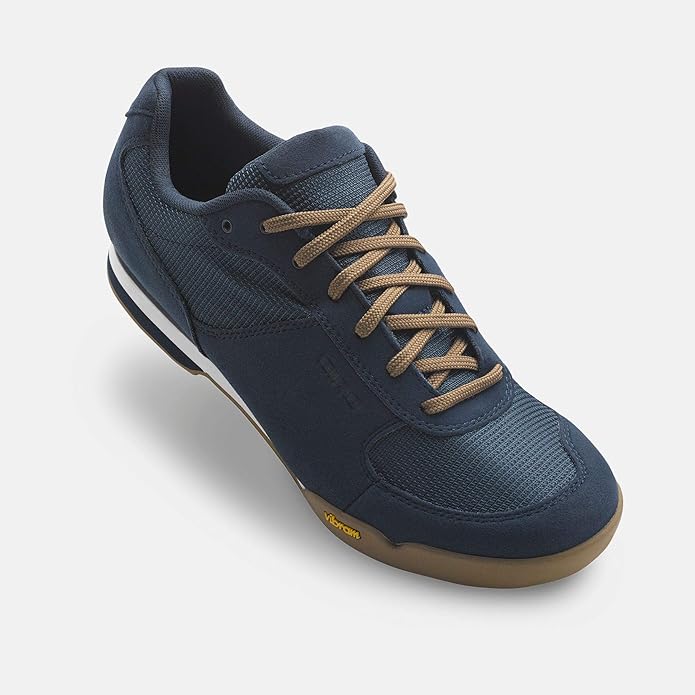
When weight/space is at a premium, multi-use gear is super valuable. I sought out a clipless bike shoe that could double as a casual shoe so I could avoid packing an extra pair. I landed on this commuter shoe by Giro. The cleats worked great on my pedals but didn’t click while I walked, and the shoes were comfortable and looked better than other brands, in my opinion. Highly recommend!
3. Chamoi Butt’r
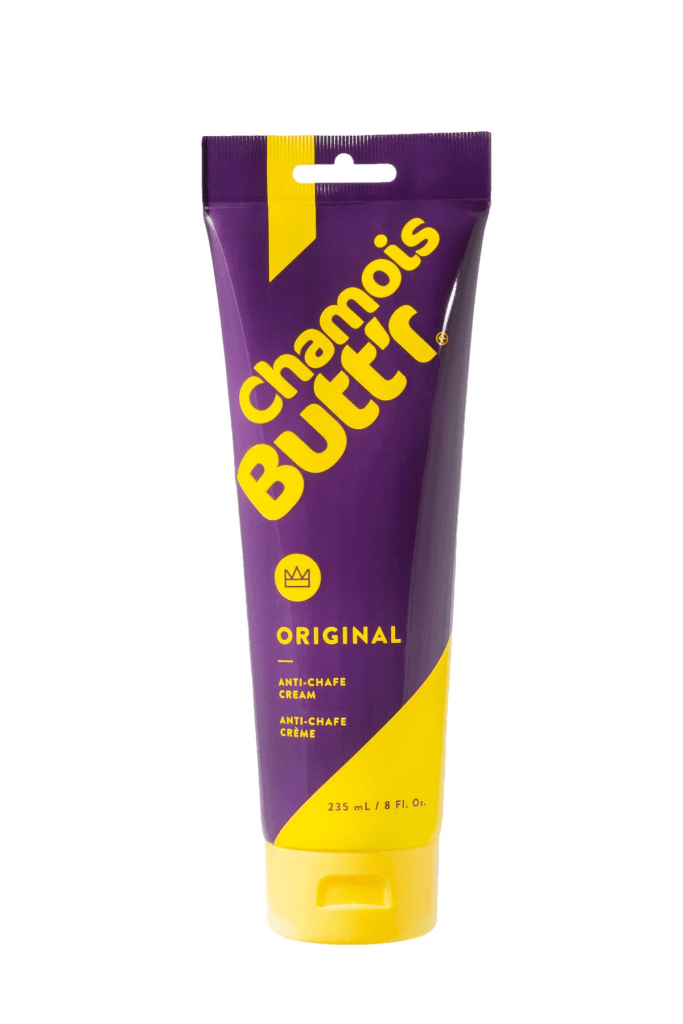
This stuff really saved my butt on the trip! Pun intended 😜. I actually had Chamoi Butt’r recommended by someone the week of my trip as a great anti-chafe cream and did a last minute order before I left. I was so thankful for it. Arguably the hardest part physically to adjusting to biking all day / every day is just sitting on the seat for so long. Chamoi Butt’r made this more bearable and help me avoid saddle sores on the trip. I used it religiously for my entire trip even after my butt got used to long rides on the trip.
4. Ortlieb Bike Bags
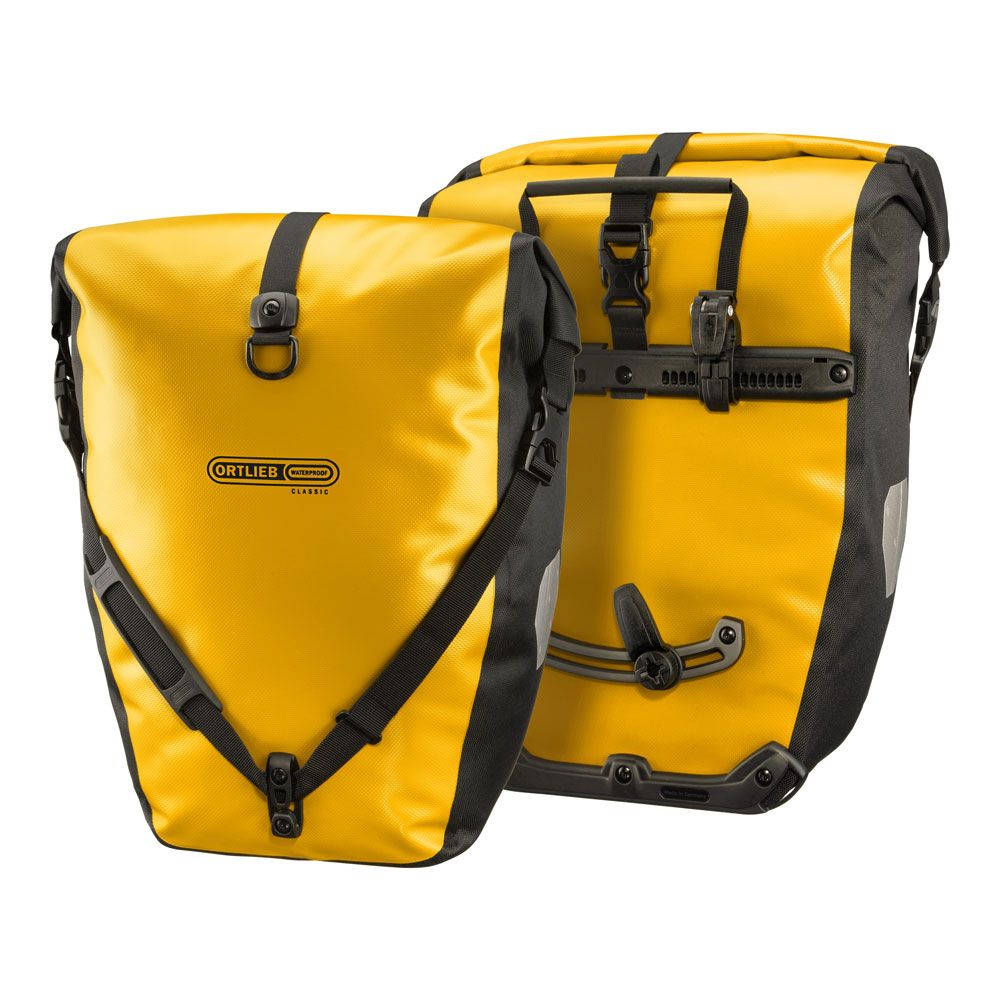
I shouted these out earlier, but the Ortlieb Sport Roller and Back Roller Classic panniers deserve another mention on this list. They do cost more than many competitors, but I opted to purchase these because they were well-reviewed and promised to be waterproof. They didn’t disappoint: I biked through torrential rain a couple times, including the remnants of a tropical storm, and my gear stayed completely dry. Plus, the bags are simple to load and mount/unmount on the bike racks.
5. Microfiber Towel

I’m rounding out the list with maybe a bit of a boring item: a microfiber towel. This was another last minute purchase for me that ended up really coming in handy. When you really want to avoid packing a wet towel in your bike bag and you don’t have time to wait around for it to dry, a quality microfiber towel is key. A medium-sized microfiber towel won’t take up a lot of space in your bag but will get you dry and dry itself in a matter of minutes.
On the Road
Now let’s talk about preventing/overcoming the day-to-day challenges of being on the road on a long bike tour. I decided to break this section up by what I thought were the top risks to success for my trip, and the precautions I took daily to prevent them. Click for tips on how to have a healthy, safe, and smooth bike tour.
Concern 1: Bike crash (or getting hit by a car)
Solution: Safety first and foremost – make yourself visible!
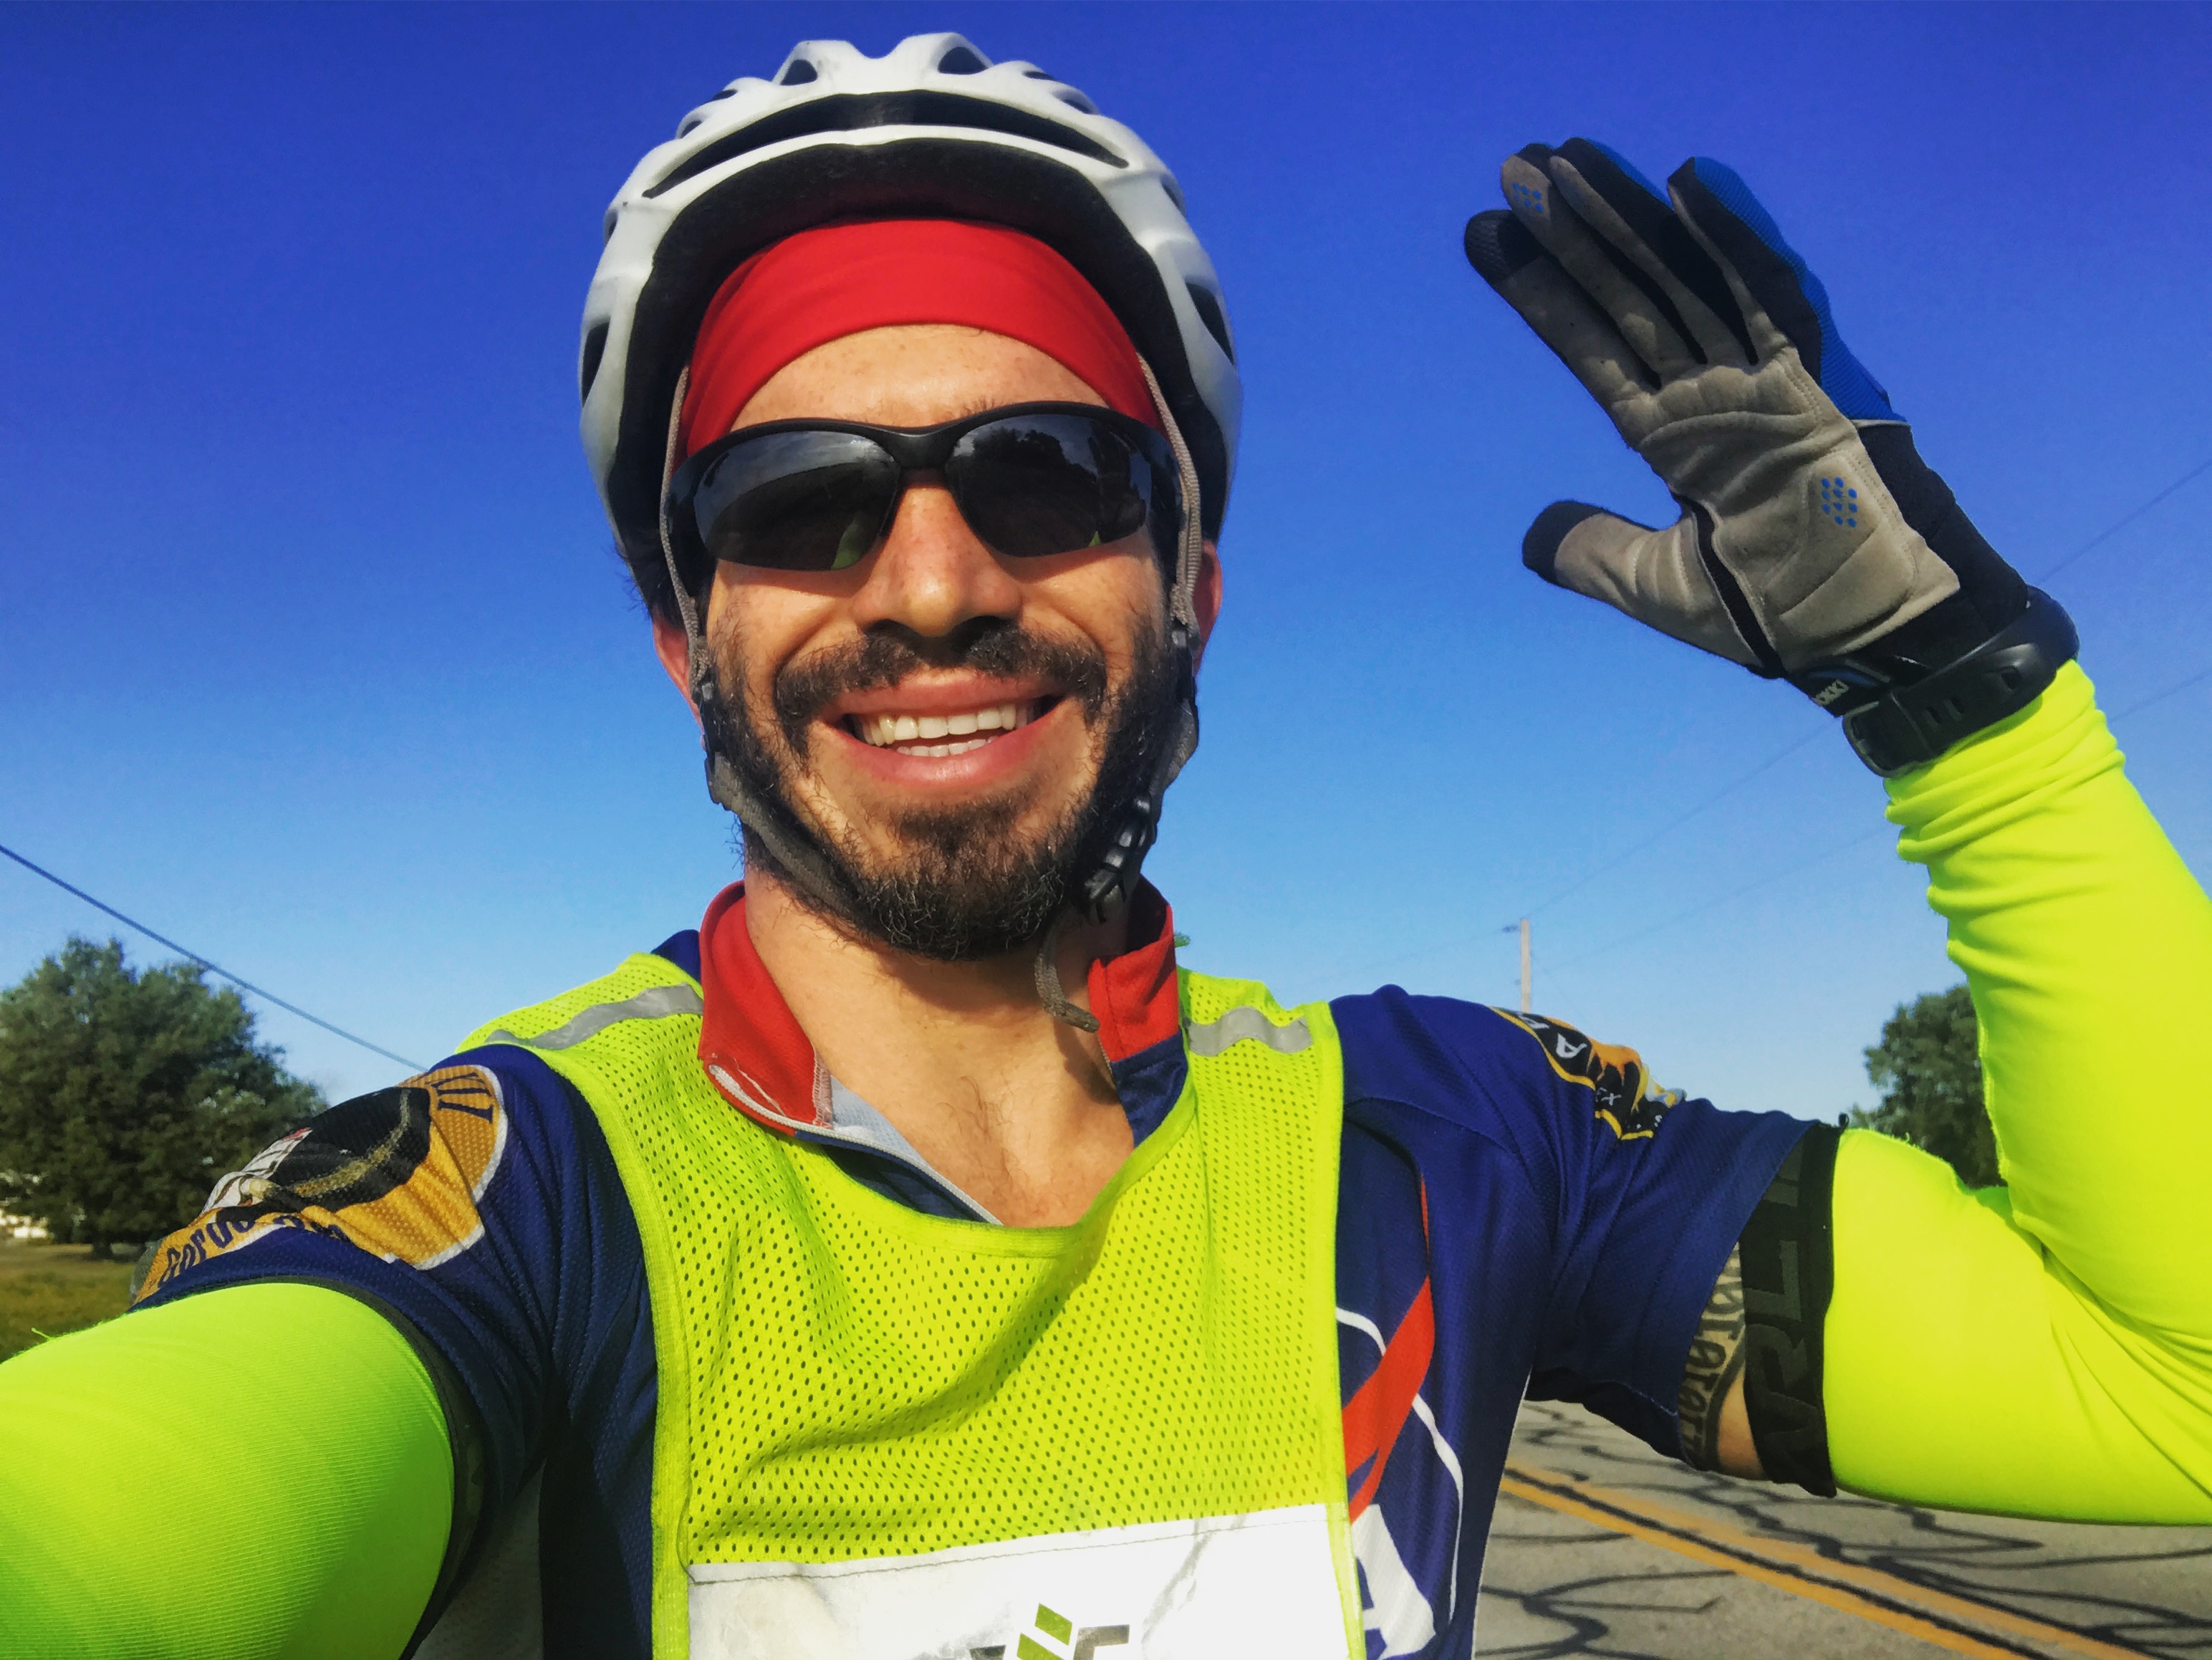
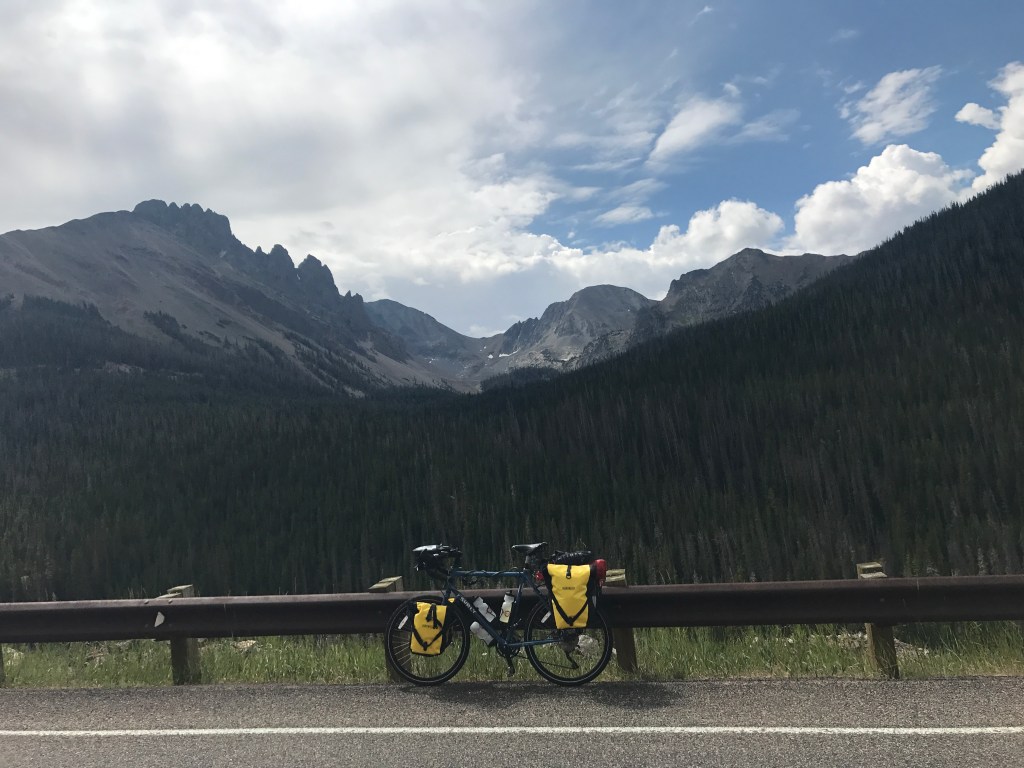
This is obviously the worst case scenario of all concerns that could cut your tour short, so you should be taking any precautions to reduce the risk here. Start by making yourself as visible as possible, especially in high-traffic areas or roads with little to no shoulder. This includes wearing bright colors, a reflective vest, and using lights on your bike/helmet (even during the day). I chose bright colored panniers as well and added reflective strips to them for added visibility. Beyond that, do whatever you can to finish your rides before dark. And finally, choose bike trails and bike friendly routes whenever possible (see route planning).

Concern 2: Bike mechanical failure
Solution: Perform routine bike maintenance and be prepared for common fixes.
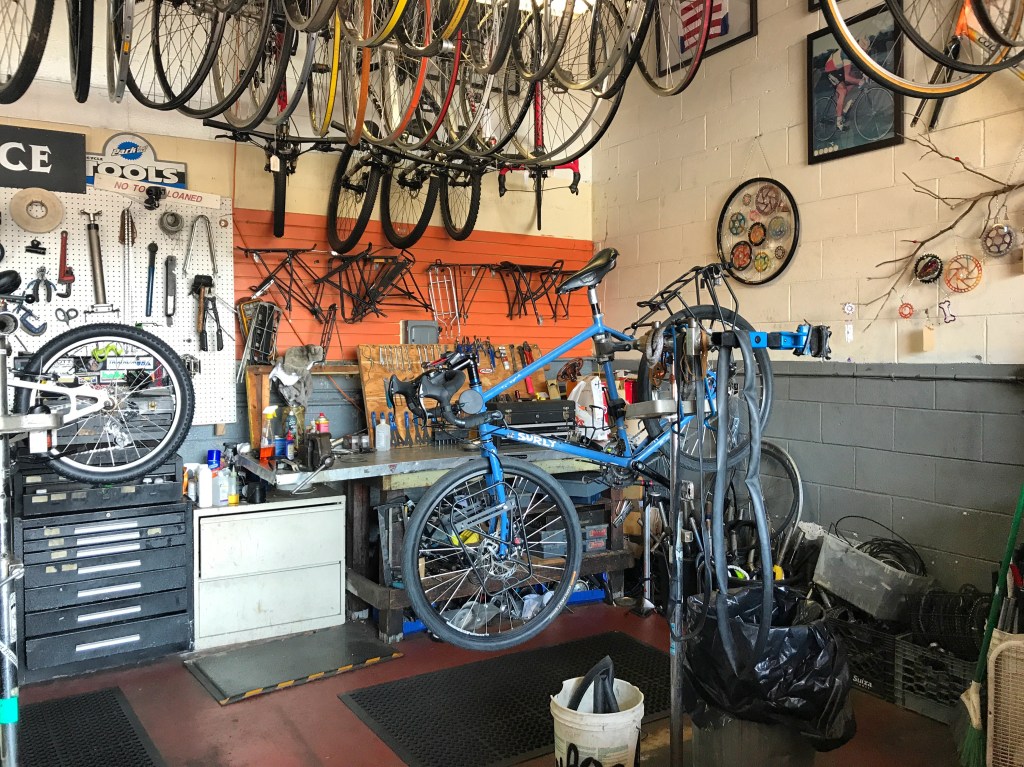
You don’t want to find yourself stranded 40 miles from the nearest civilization with a broken bike. Regular preventative maintenance will go a long way to minimizing the chances of this happening to you. I did “express tuneups” 1-2 times per week or whenever I had a hotel stay (see video below) and got three professional tuneups throughout my cross country trip. Aside from tuneups, I familiarized myself with common repairs – expect to get plenty of practice fixing flats 😉. Always carry a spare tube or two and a patch kit.
Concern 3: Bike theft

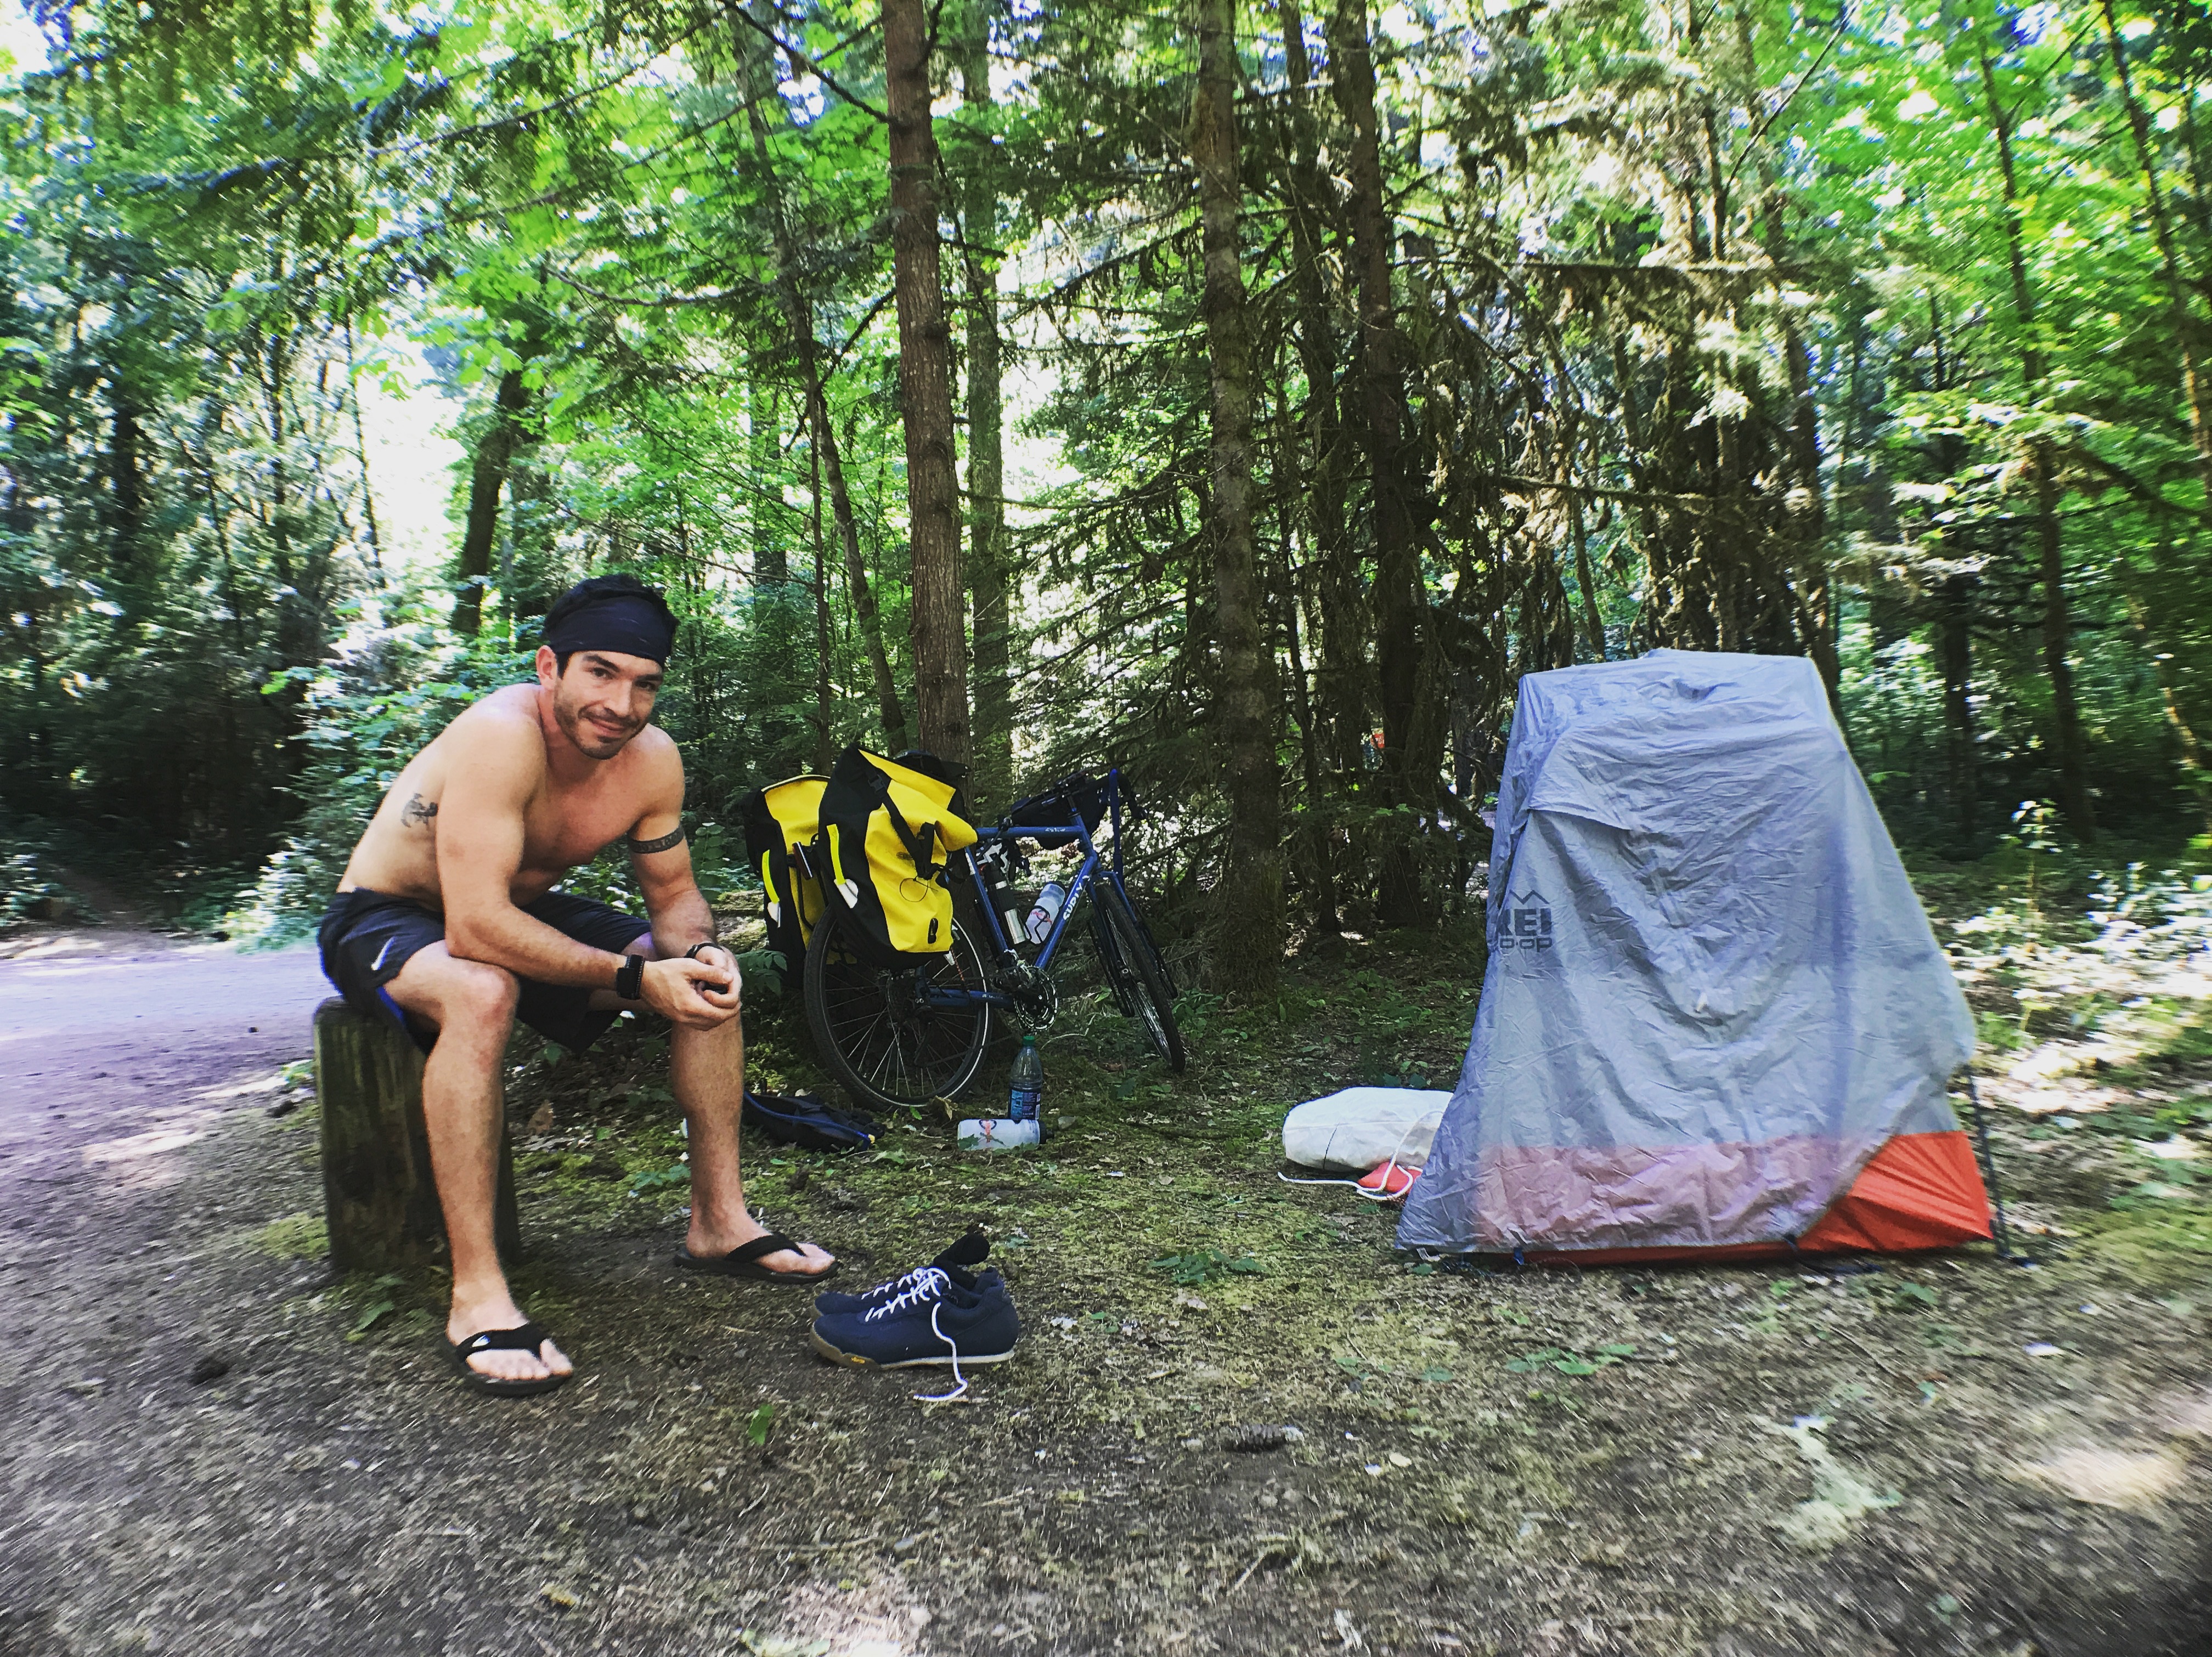
Solution: Use a quality lock – but make it a goal to never take your eyes off the bike!
I personally viewed bike theft as the most likely thing that could prevent me from making it to the East Coast. I didn’t even like that I had to go in my tent and leave the bike locked up outside a few feet away. Obviously, you can’t take your bike with you everywhere. But do your best to park it strategically so that you can periodically check on it if you do have to temporarily part ways to buy food, etc.
Concern 4: Injury

Solution: Take care of your body with stretching, massage, and rest days.
Just like maintenance to prevent bike failure, you should establish a regular recovery routine to help prevent your body breaking down from wear & tear injuries. Aim to get a stretch session in after each day’s ride and, if possible, some self massage (I packed this portable massager on my trip). Try to schedule a rest day at least once per week to allow your body to recover. If financially possible, mix in some indoor stays (hotel, AirBnb, etc.) for a good night’s rest in a (hopefully) comfy bed. Finally, try to do some amount of physical preparation prior to your trip and head into it with a solid base biking mileage.
Concern 5: Running out of water
Solution: Plan ahead for long rides – know where you can re-up on water along the way or pack extra water.
For much of the country (especially out West), you can’t bank on passing a gas station every 50 miles on any given route. So having enough water for your ride requires being strategic about water stops when you’re planning the route for the day. This may require adding extra miles to your ride to make sure you pass through towns frequently enough to restock on water.
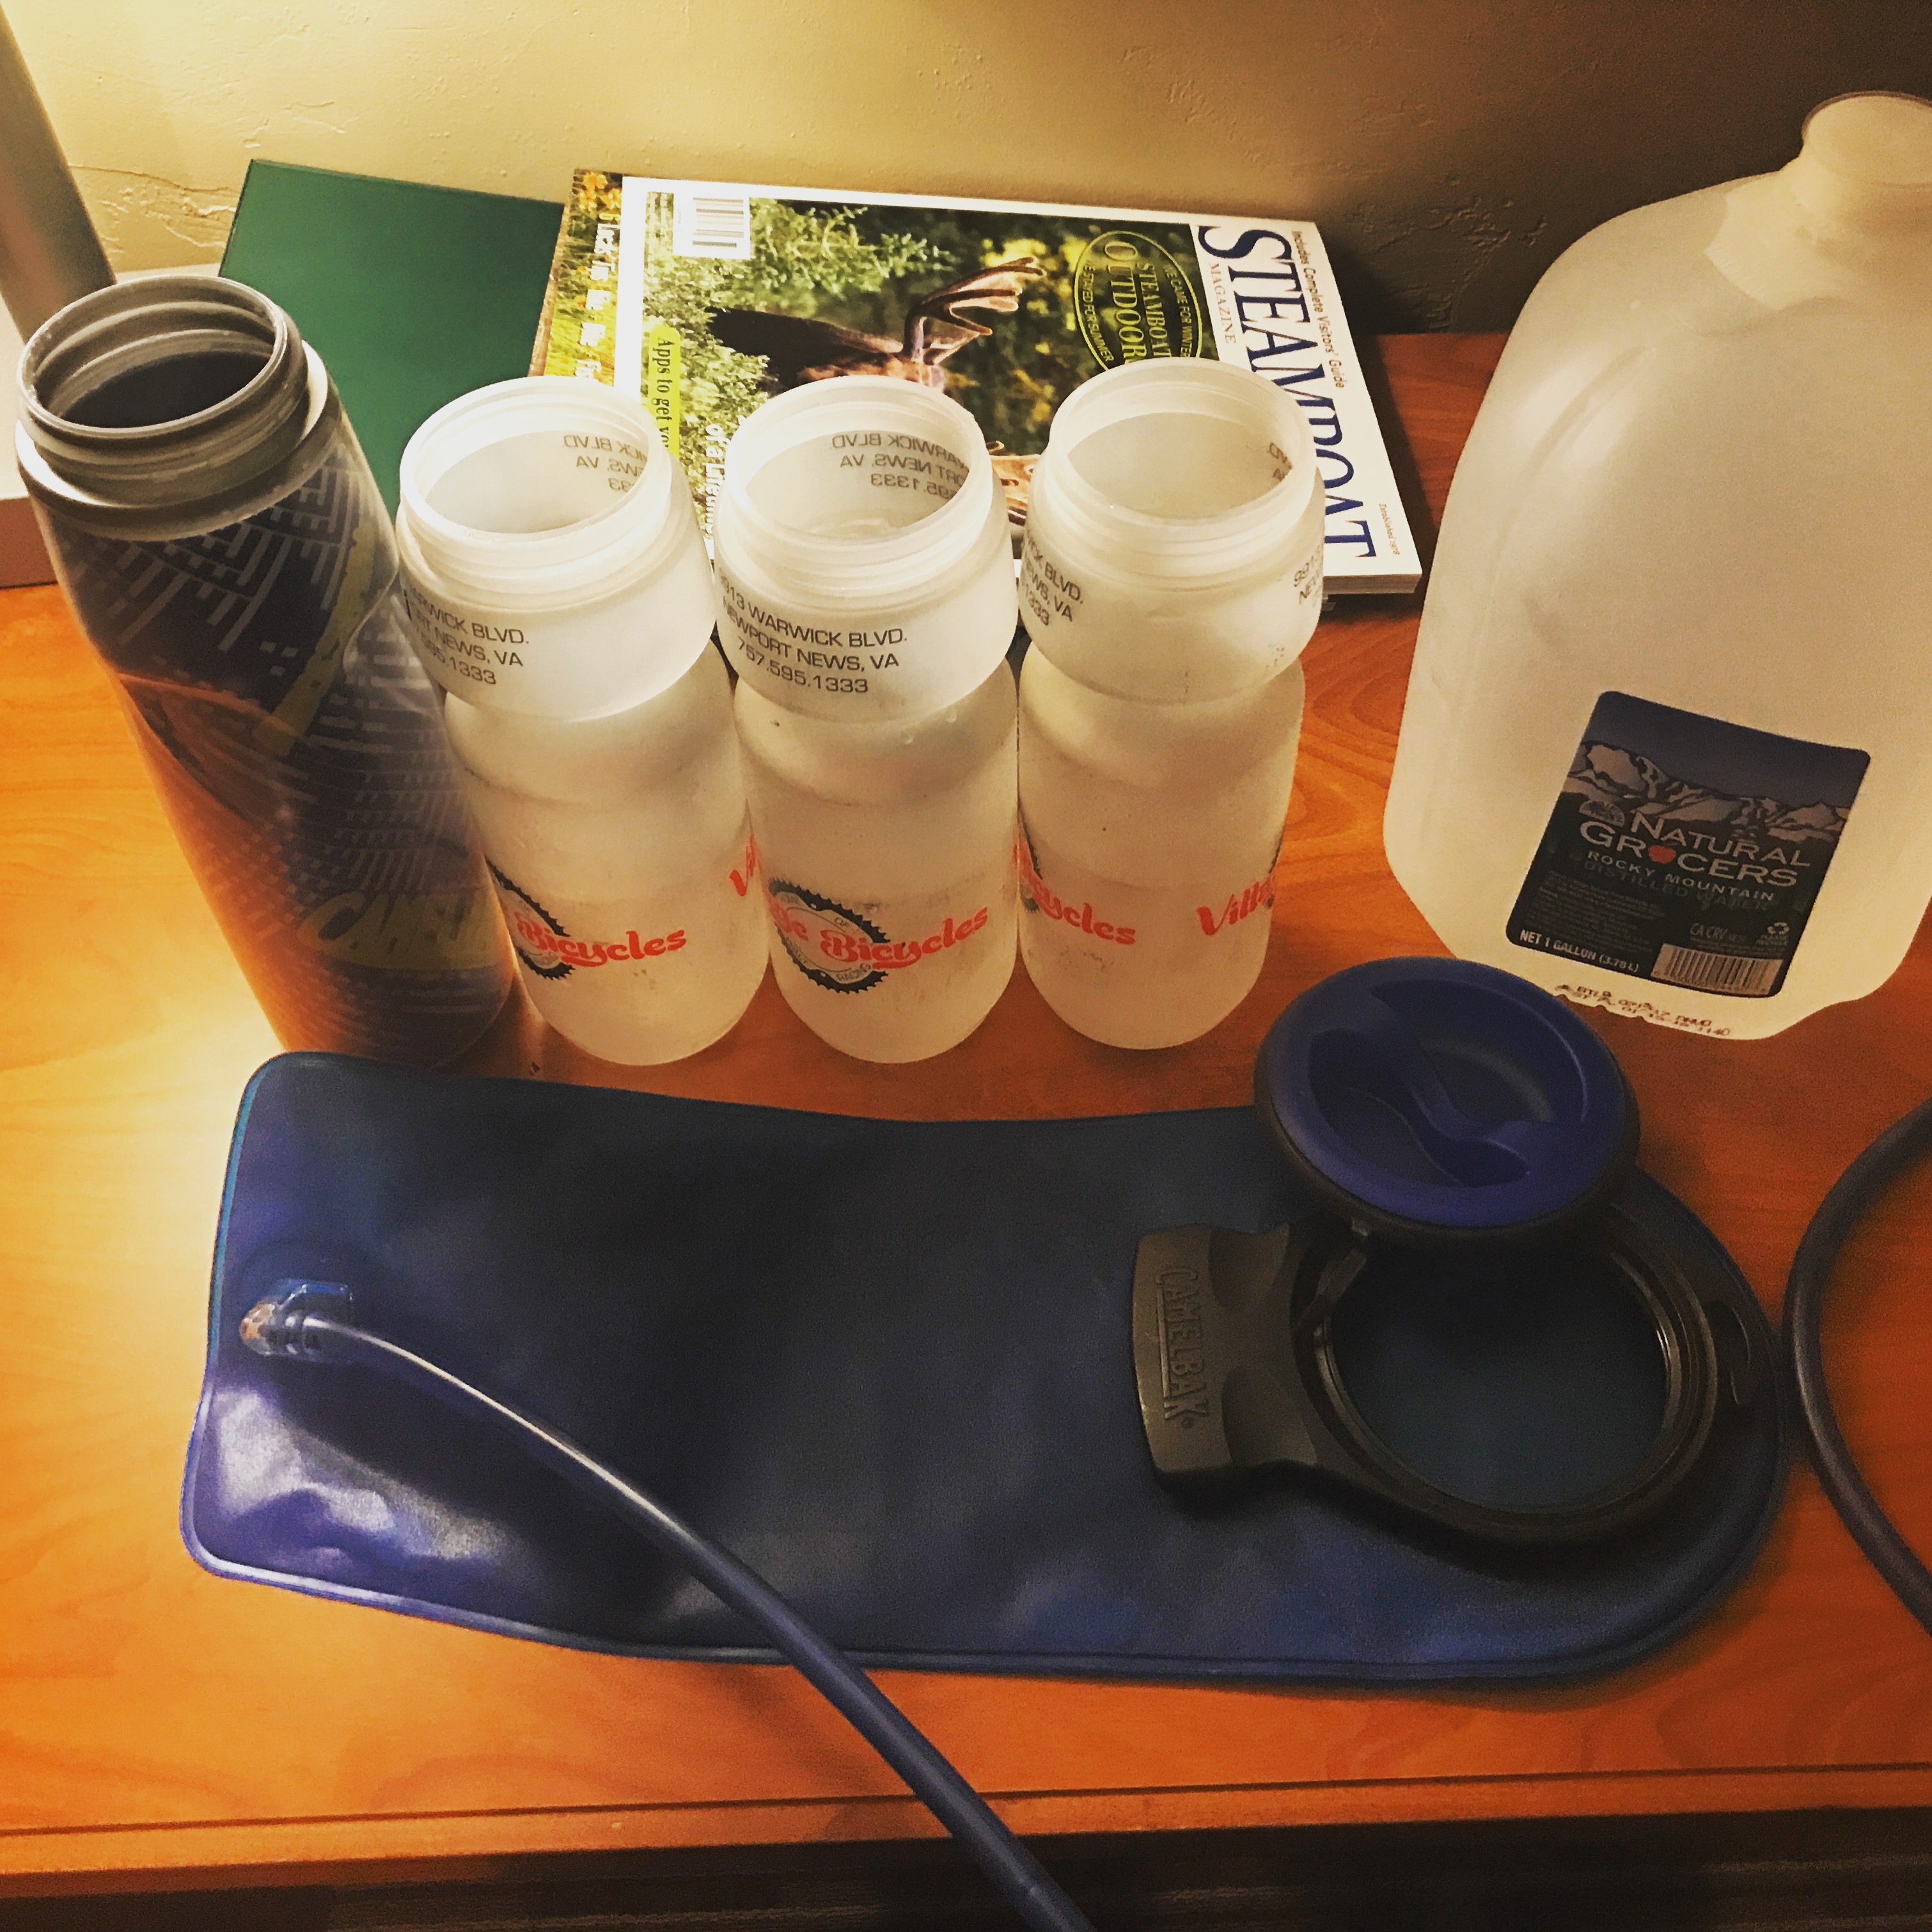
Even with planning ahead, you’ll likely have days where you’ll ride 50+ miles without a water pitstop. So have pack extra water reserves that you can fill up for long rides. Don’t forget your electrolytes too! I preferred carrying Nuun tablets, but any portable powder/tablet works.
My bike had three water bottle cages but I carried an extra bottle and Camelbak that I kept empty except on long stretches through the middle of nowhere. If all else failed, I also carried a LifeStraw for drinking from a natural source in a pinch.


Concern 6: Running out of charge
Solution: Carry a portable charger and recharge whenever possible.
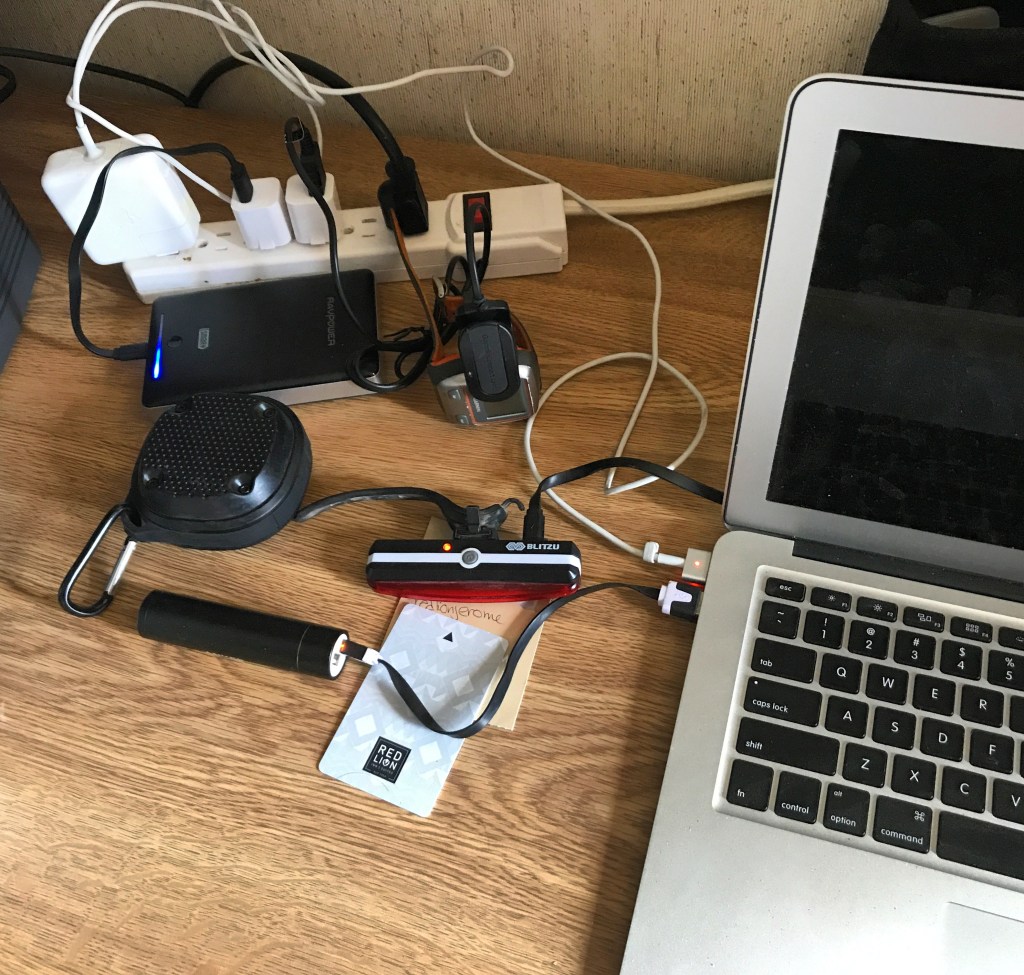
You’ll want to make it a goal to never let your phone die in case of emergency. This gets more challenging if you’re taxing your phone’s battery with navigation, playing podcasts/music, etc. all day and if you’re camping at night without access to electricity.
Pack a portable charging block or two for your trip. I kept my phone hooked up to a smaller charger in my handlebar bag and had a larger charger in my panniers for backup. Make it a routine to recharge all electronics (phone, portable chargers, bike lights, etc.) whenever you have access to electricity overnight. If you’re planning to mostly camp at night, you can also buy a portable solar panel so you can charge while you ride.
FAQ
To finish up this guide, I’m providing my answers to some Frequently Asked Questions about cross country bike touring that I’ve either been asked by others since my trip or that I had myself for others before I left for my trip.
How often did you camp vs. hotel vs. Airbnb vs. other?
The type of accommodations used throughout a bike tour comes down to a balance of saving money and taking care of your mind/body. You’ll save a ton of money if you opt to camp every night, but splurging on indoor accommodations with electricity, shower access, a bed to sleep in, etc. can leave you feeling more physically/mentally rejuvenated for powering through your next day’s ride. Ultimately it will come down to your budget and your love (or tolerance) of the great outdoors.
I camped roughly 1 out of 3 nights over the course of my trip, only camping back-to-back nights twice. I personally found it pretty tough to repeatedly bike 6-10 hours per day followed by sleeping on the ground in the tent. Plus, I was fortunate to have saved up enough PTO at work that I was still getting paychecks on the road, affording me the ability to splurge a bit on extra comfort.
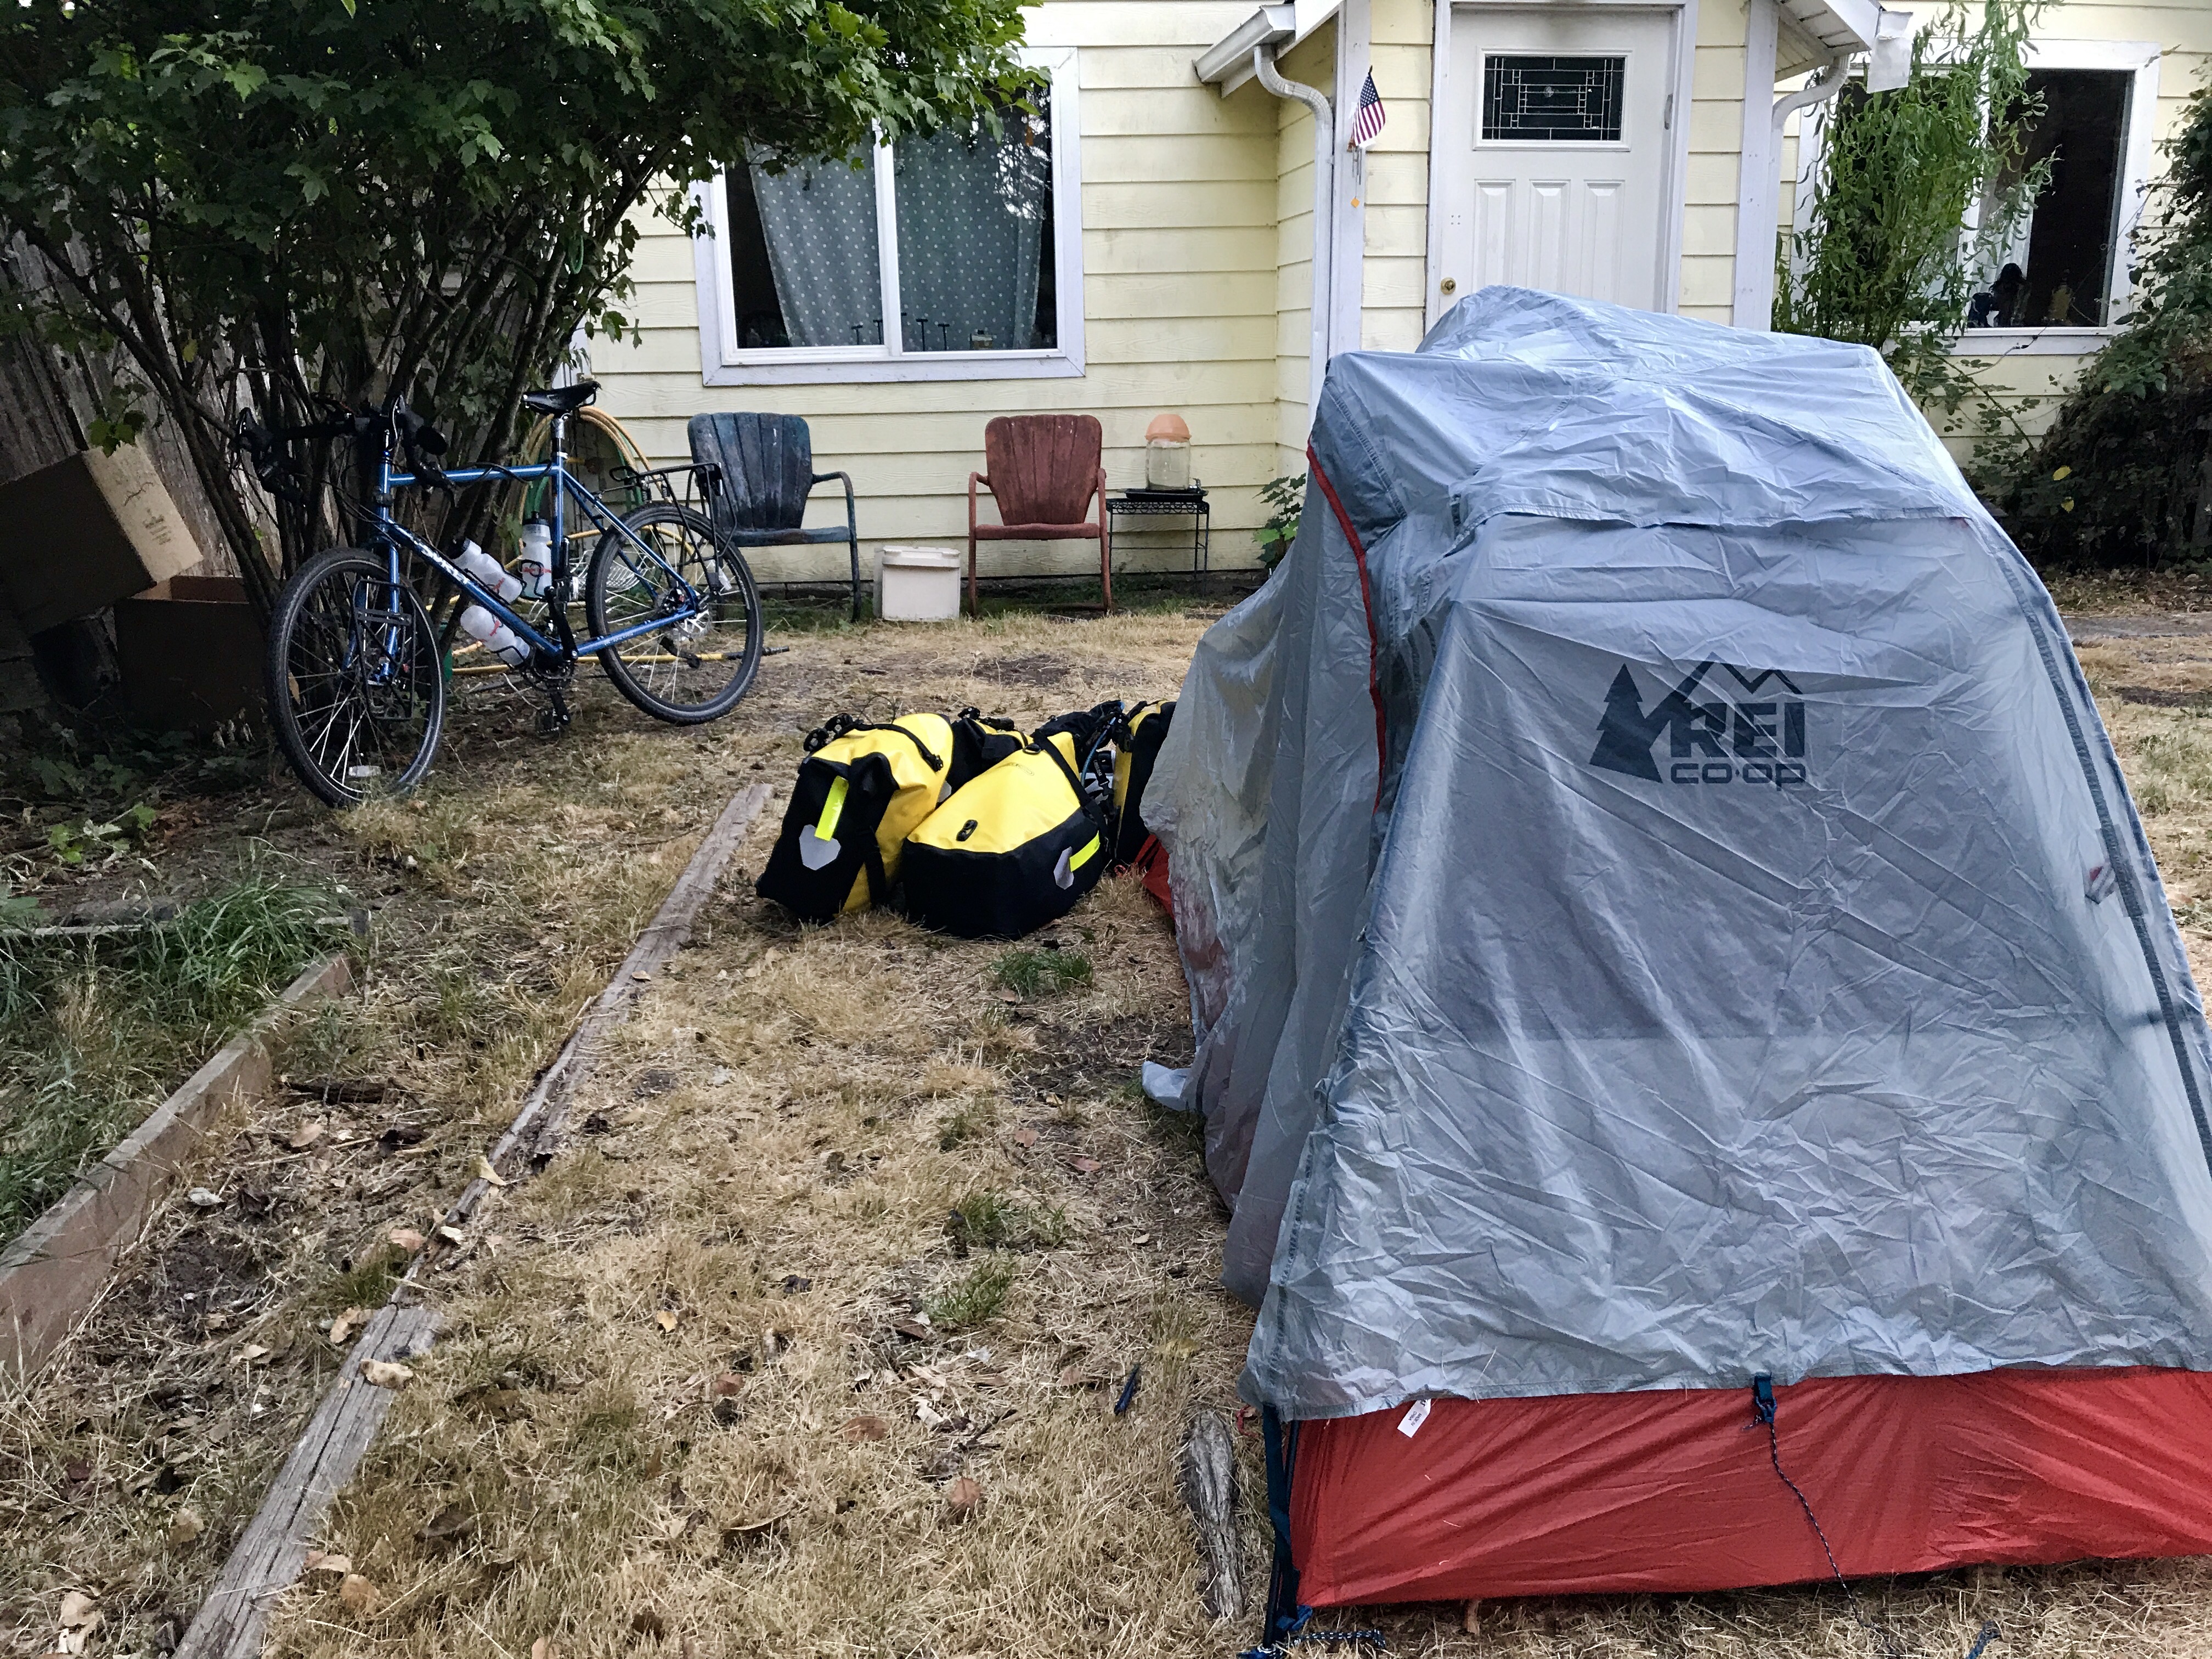
I ended up trying most types of accommodations on my trip: camping, hotels (from decently nice to down right dirty), Airbnb, WarmShowers, and staying with friends (of friends). My personal favorites for balancing cost/comfort were RV parks for camping with extra amenities and AirBnb single rooms as relatively cheap indoor stays.
How do you bike through the Rockies with all that gear!?
This was one of my biggest questions/concerns heading into my trip. Back then, I had never driven through or visited the Rocky Mountains, only viewing them from a distance when visiting Denver. So I think I let my imagination run wild with how intense that part of the ride may be (20% gradients, blizzards in the summer, etc. 😅).
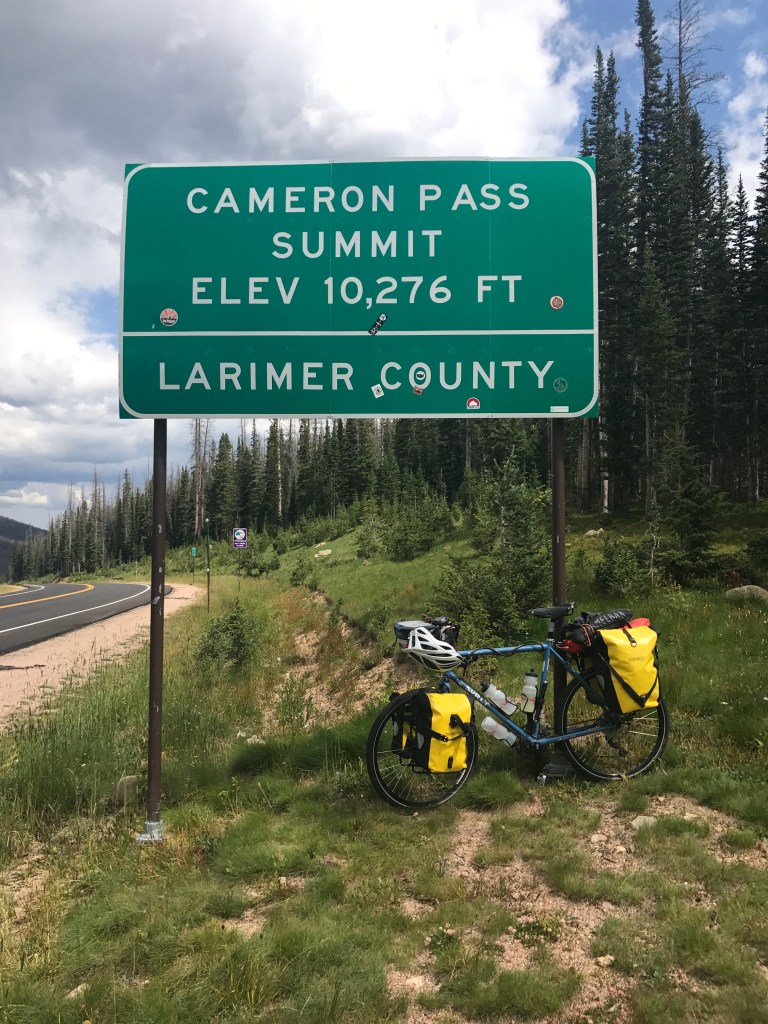
Now, I can only speak to my particular route through Colorado (Steamboat Springs -> Walden -> Fort Collins), but biking through the Rockies wasn’t as challenging as I thought it would be. This also echos what I heard from a couple experienced cyclists when I asked them prior to my trip. The hardest climbs through the Rockies were comparable to some in other parts of the country along my route. The increase in elevation was slow and steady coming from the West, giving me a chance to adjust to it over the course of a few days before hitting the summit on my route. Plus, if you’re doing a cross country trip, you should be in pretty good shape by the time you get there.
There’s also plenty of reasons to look forward to crossing the Rockies rather than fear them: it is arguably the coolest and most memorable part of the trip! The scenery is unmatched and the sense of accomplishment from powering on a bike is unforgettable. Just make sure you’re avoiding months where there’s likely to be snow, and enjoy the ride 😎.
How much physical training is required to embark on a long term bike tour?
I was definitely in good shape heading into my trip, working out daily and biking 3-4 days per week. Having said that, I think it’s easy to overestimate how much physical training you need. I felt that the main challenges were mental (am I there yet?) and logistics (see route planning section above). You’ll get in good biking shape on the fly as you go, just plan on having a sore butt/neck/legs/etc. for a week or two and try to plan low-to-moderate mileage days in the beginning of the trip to ease in.
Having said that, I recommend biking enough in the weeks and months leading up to the trip to be comfortable sitting on the bike for extended periods of time. It’s a good idea to do at least a few long bike rides with your gear loaded (or weights to simulate it) to get used to hauling the weight (or convince yourself to carry less gear 😝). I told myself I’d try at least a 1-2 night mini tour to prepare for my cross country trip but I never got around to it. While I lived to tell about it, doing a test run like this would certainly be helpful.
How much clothes did you pack?
With space at a premium, you’ll want to pack as little clothes as you can while being conscious of your comfort (and tolerance for being smelly). I valued having the little extra comfort of a clean/dry outfit at the end of a long day biking, so I may have packed a bit more than the average bike tourist. Here’s the complete list of clothing items that I packed for my cross country trip:
- Three bike jerseys
- Three pairs bike shorts
- One pair athletic shorts
- One pair casual shorts
- Three casual shirts, one tank top
- Three pairs underwear
- Three pairs of socks
- One pair bike shoes (that doubled as casual shoes)
- Flip flops
- Cold/rain gear: spandex pants, rain coat, hoodie, arm sleeves
What were the biggest surprises?
I was surprised by a lot of things on my trip! Here’s a short list:
- Lack of civilization out West. While I expected this to some degree, I totally underestimated it. I’d often go an hour or two without having traffic pass me by (which was nice) and learned quick that you might go 100 miles without passing through a populated town without proper planning (which, as I mentioned earlier, made route planning surprisingly hard also).
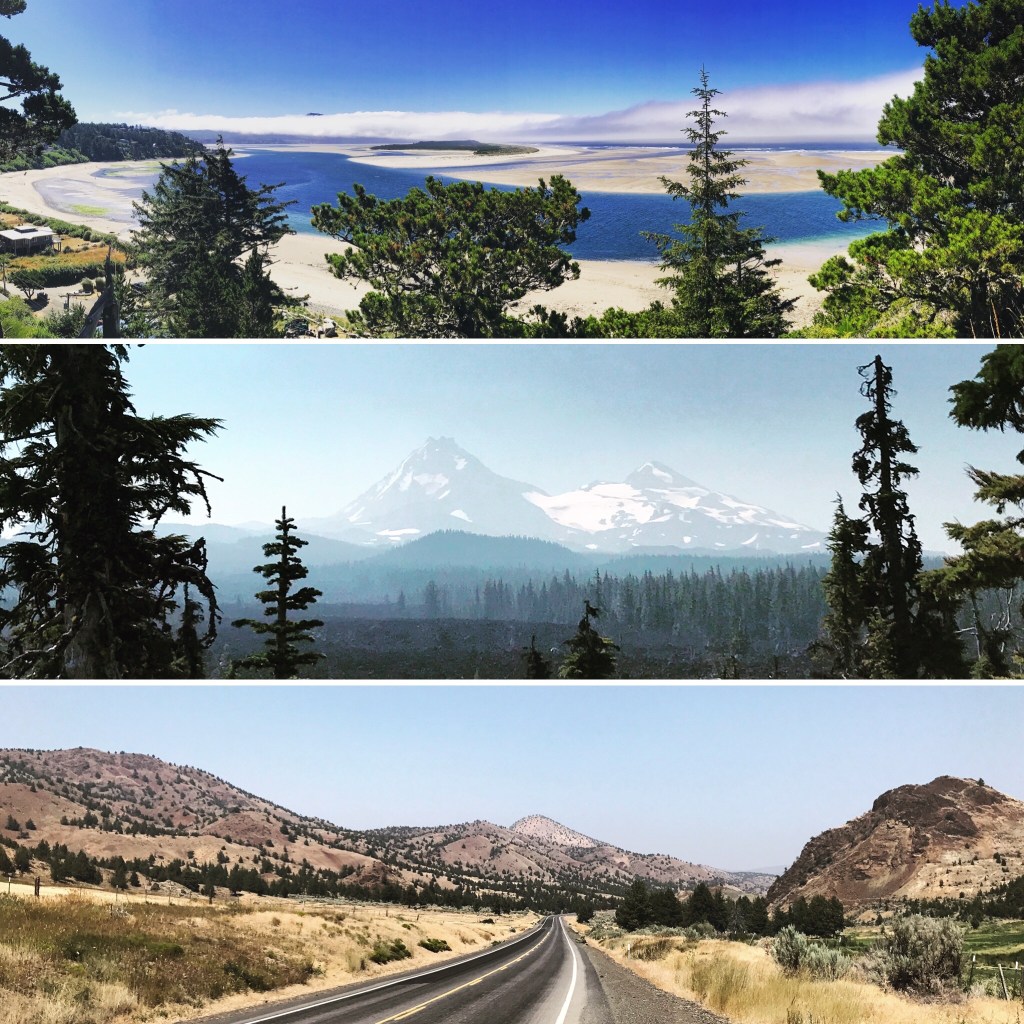
- “There’s desert in Oregon!?” – me on day four of my trip 😅. The amount of desert in the Northwest, US was definitely surprising to me. I expected to ride through desert landscape in Utah, but I admit that I was caught off guard when most of my ride through Oregon and Idaho was also desert.
- The not-so-intimidating Rockies. I already mentioned this above in FAQ, but as I kept slowly and steadily ascending the mountain range, I kept waiting for the crazy/impossible climb that never happened.
- People’s willingness to help a crazy stranger on a bike. The pleasant surprise of the trip was the outpouring of support and encouragement I received throughout my trip, from both friends/family/acquaintances, but also from total strangers. Several times on my trip, friends of friends who I’d never met welcomed me into their houses to stay the night, let me shower, cooked me dinner, etc. Dozens of strangers opened up their wallets and supported a fundraiser I was running for the Boys & Girls Clubs throughout my trip. The interactions I had with super friendly and encouraging people along the way who I’d never see again in my life was one of the coolest parts of the journey.
Closing
Hopefully if you’re a new/aspiring cross country cyclist and you’ve stumbled across this post, it has been helpful for you. And since this ended up being a much longer read than I intended, thanks for sticking around until the end! If you have any other questions for me on anything I didn’t cover, I’m happy to chat: email me at jimwarnerendurance@gmail.com.
Now what are you waiting for – commit to your trip!
Acknowledgements
This blog post is an accumulation of the lessons I learned by going through the planning/research process and bike tour experience myself. But I also learned a lot from others who deserve an acknowledgement since their second-hand guidance and tips have appeared in this post.
I sent many of the pre-trip questions I had to anyone I could find who had done bike tours before, and got useful pointers from people like: Pierre Rouzier, Aaron Daytime, Ally Bolger, and Mike Matthews. Mike deserves a big shout here: he was the only friend I had who had biked across the country before which served as inspiration in itself. He also sent me a long and detailed email a couple months before my trip with a lot of helpful pointers from his experience, and helped give me the confidence I could do it myself.
Walt and Connie at Village Bicycles were super helpful in getting the gear I needed for the trip (including the bike!) and making me feel at home with my crazy plans to set off across the country with no previous touring experience. Highly recommend their shop to anyone local to Newport News, VA.
Finally, Patrick “Mission Control” Leser was the good friend/colleague of mine behind my advice to “Ask a friend/family member to help you do route recon” earlier in this post. He was instrumental in helping me find safe routes and freeing up some extra time for me to just enjoy the trip. We learned bike touring on the fly together.